in this guide
You need to tell us when your circumstances change. Then we can assess your eligibility for payments and services using the correct details. This includes changes to Australian listed shares for you and your partner.
Read about deeming rules for shares and other financial investments that may affect your payment.
The screenshots in this guide are from a computer. The page layout will look different if you’re using a mobile device.
Step 1: get started
Sign in to myGov or the myGov app and select Centrelink.
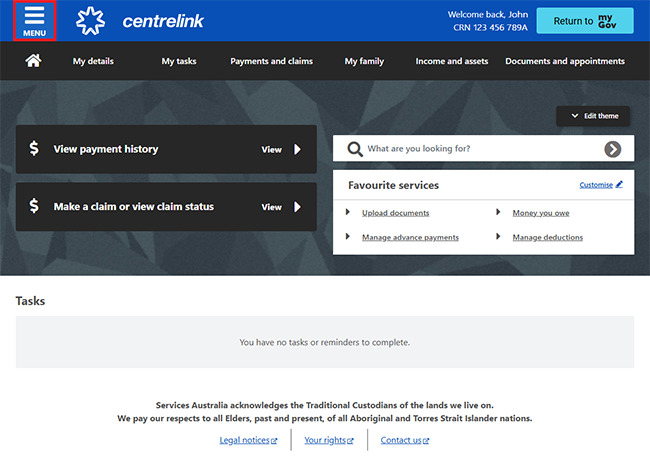
Select MENU from your homepage.
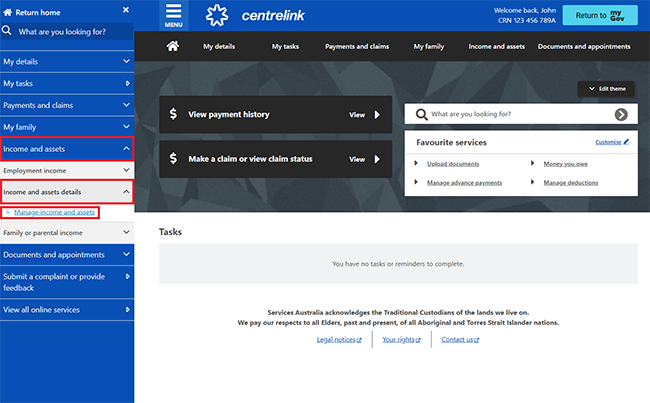
Select Income and assets, then Income and assets details and Manage income and assets.
Read What you need to know before you start. Then select Continue to proceed.

Step 2: view shares details
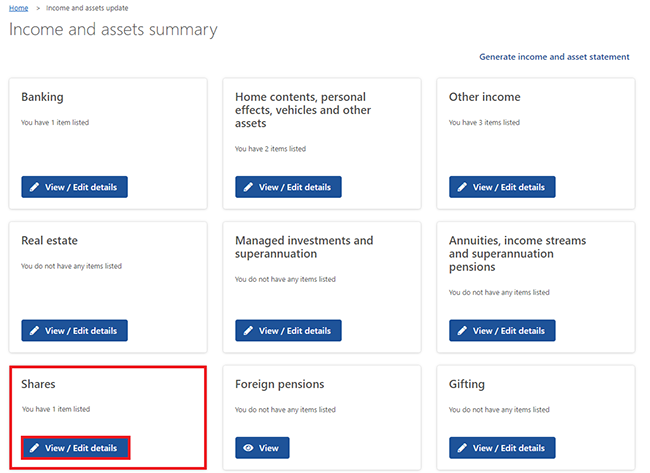
On the Income and assets summary page, select View/Edit details in Shares.
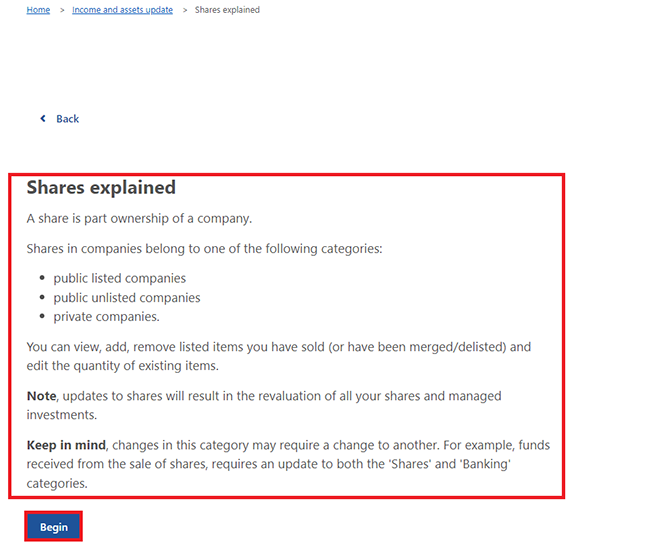
Read Shares explained, then select Begin.
The shares details you’ve already told us about will show.
Select any of the following:
- Home if you don’t need to make any changes
- Edit to update your shares details and go to Step 3 for instructions
- Delete to remove your shares details and go to Step 4 for instructions
- Add to add new shares details and go to Step 5 for instructions.
Some of your shares details may not have an edit or delete option. You’ll need to contact us to make changes to these items.
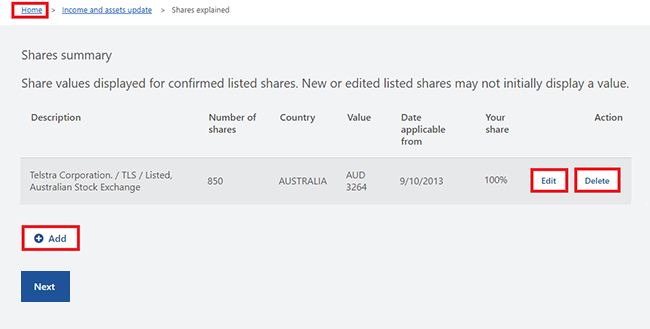
Step 3: edit shares details
If you need to update any of your shares, select Edit.

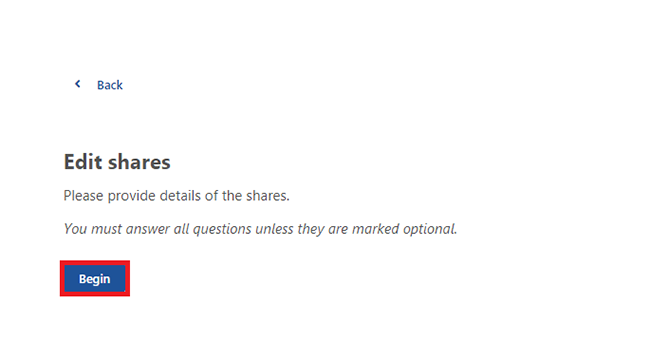
Select Begin to edit your shares details.
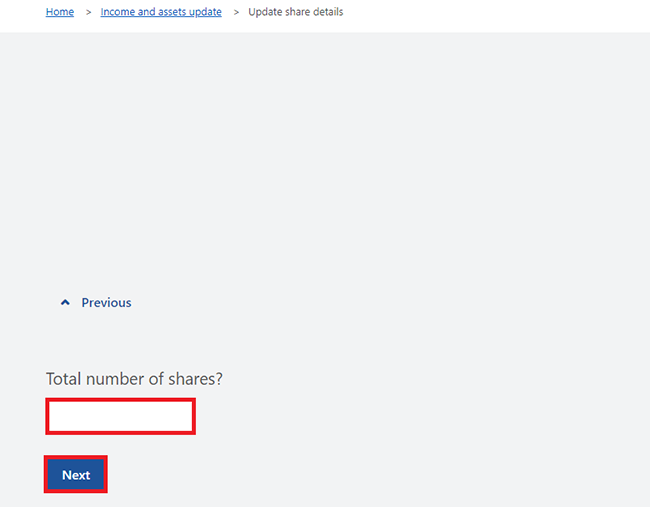
Enter the new Total number of shares.
Then select Next.
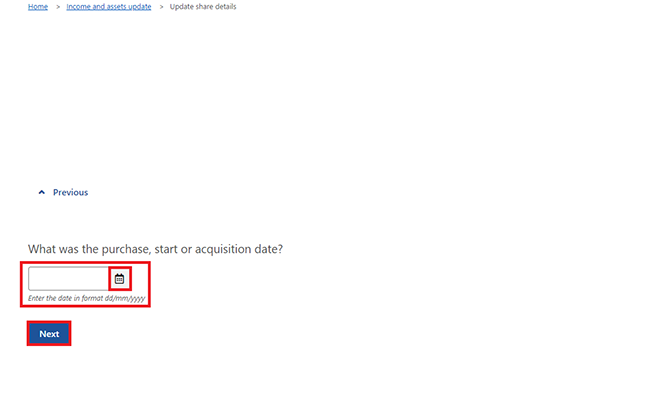
Select the calendar icon and enter the purchase, start or acquisition date. Or, enter it manually in the format of dd/mm/yyyy.
Then select Next.
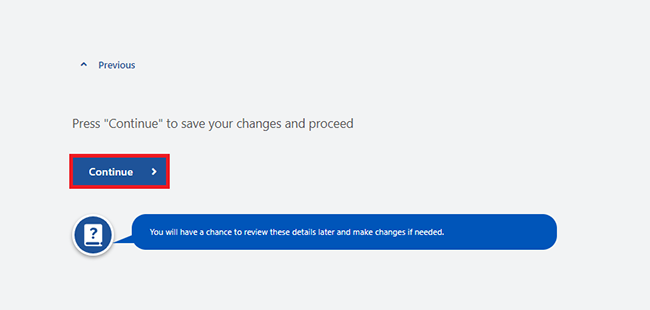
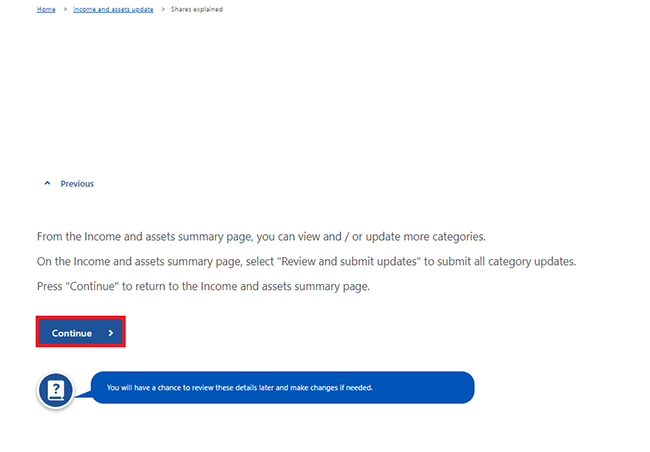
Select Continue to save your changes and proceed.
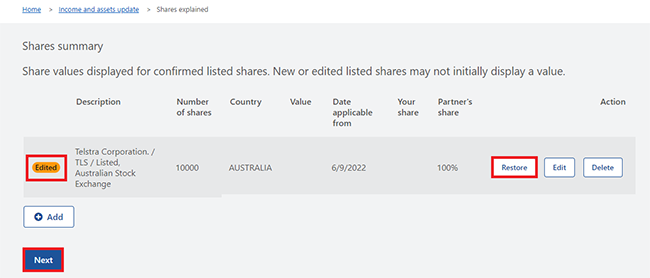
The details you changed will show as Edited on the Shares summary page. Check the information to make sure it’s correct.
If you’ve entered the wrong details, select Restore to bring back your previous details.
To delete home contents, personal effects, vehicles and other assets details, go to Step 4.
To add new home contents, personal effects, vehicles and other assets details, go to Step 5.
If the details are correct and you’ve finished making changes, select Next.
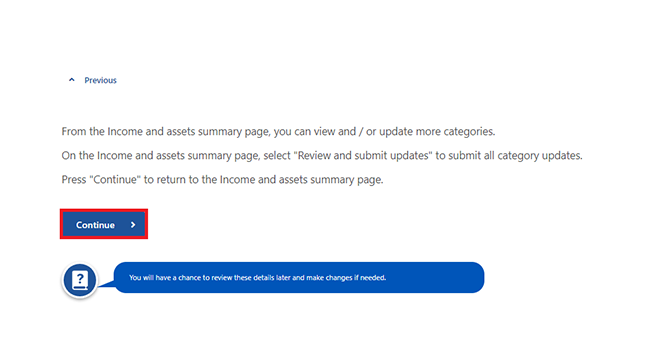
If you’re ready to review and submit your changes, select Continue.
Go to Step 6 for instructions on how to review and submit your changes.
Step 4: delete shares details
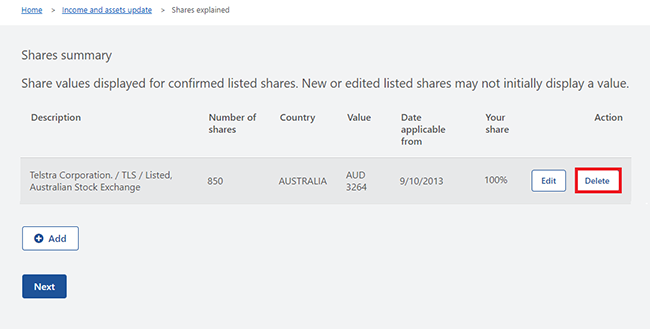
If you need to remove any of your shares details, select Delete.
Select either:
- OK to continue
- Cancel if you no longer want to delete your shares details.

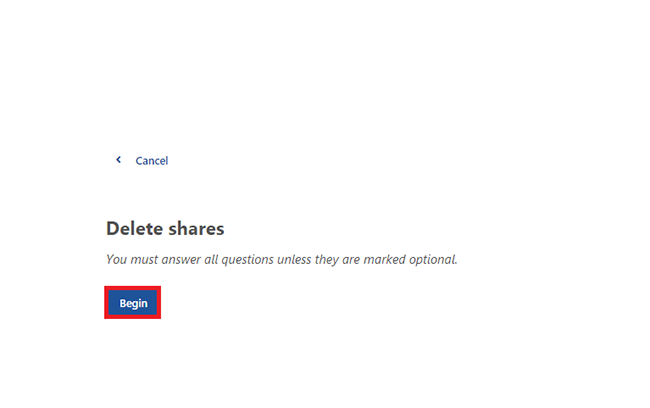
Select Begin to continue.
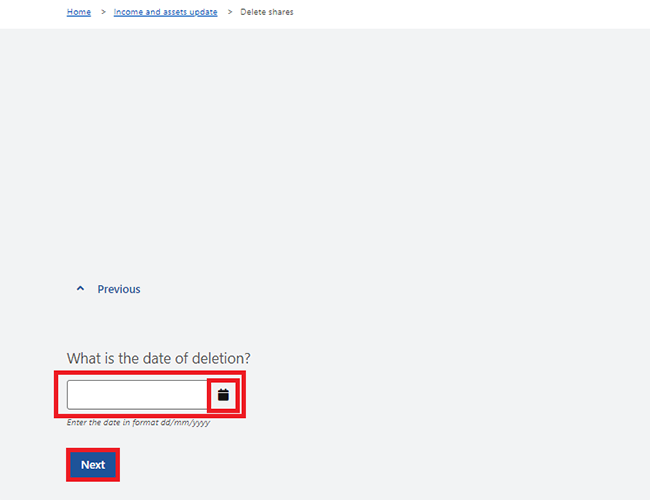
Select the calendar icon and enter the date you deleted your shares. Or, enter it manually in the format of dd/mm/yyyy.
Then select Next.
Select Delete to proceed.

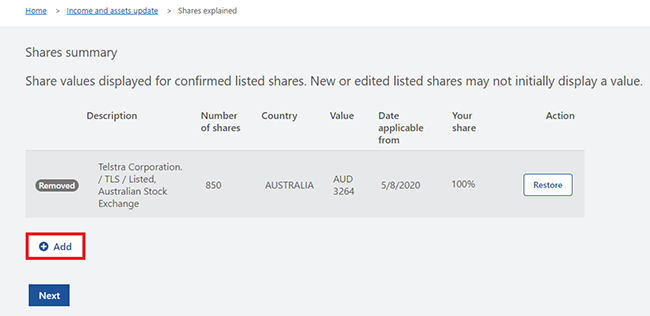
The details you deleted will show as Removed on the Shares summary page.
If you’ve deleted the wrong details, select Restore to bring back your previous details.
To add new shares details, go to Step 5.
If the details are correct and you’ve finished making changes, select Next.

If you’re ready to review and submit your changes, select Continue.
Go to Step 6 for instructions on how to review and submit your changes.
Step 5: add new shares details
To add new shares details, select Add.
Select Begin to continue.
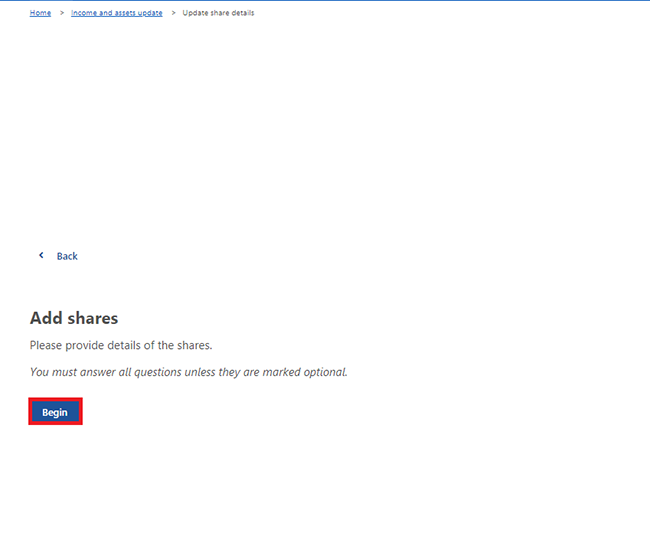
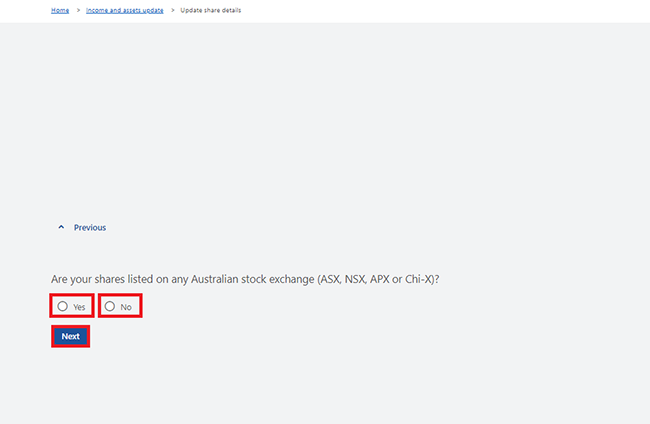
Select Yes or No to tell us if your shares are listed on any Australian stock exchange.
Then select Next.
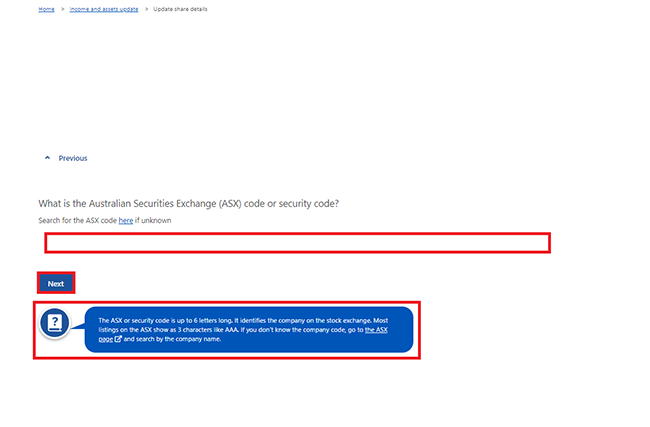
If your shares are listed on any Australian stock exchange, enter the Australian Securities Exchange (ASX) code or security code. Then select Next.
If you need help, read the information with the question mark icon on each page.
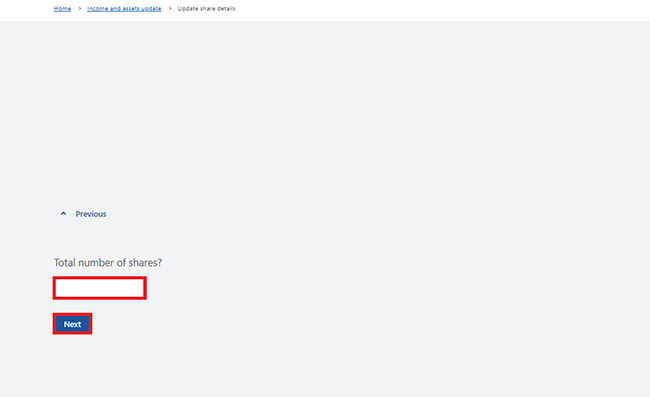
Enter the Total number of shares, then select Next.
Enter your share of ownership in whole numbers.
If you have a partner, enter their share of ownership in whole dollars.
Then select Next.
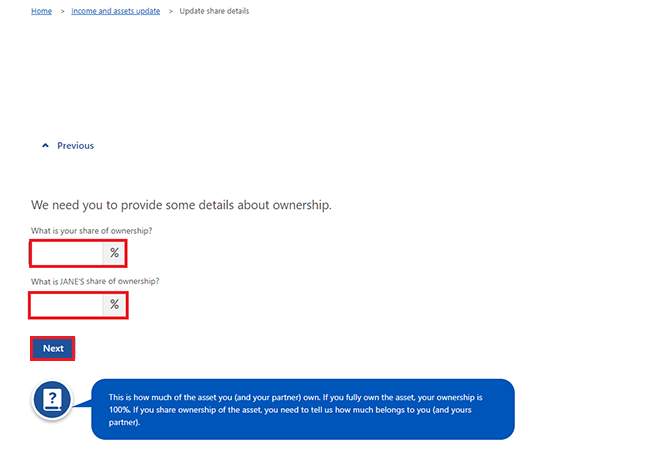
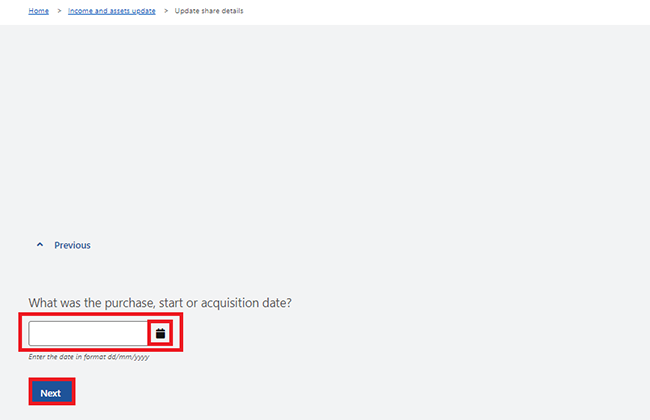
Select the calendar icon and enter the purchase, start or acquisition date. Or, enter it manually in the format of dd/mm/yyyy.
Then select Next.
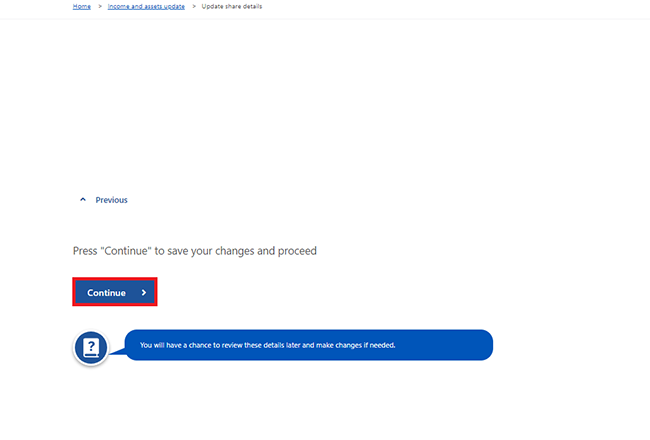
Select Continue to save your changes and proceed.
The details you added will show as New on the Shares summary page. Check the information to make sure it’s correct.
On this page, you can select any of the following:
- Edit if you need to make changes
- Delete to remove your update
- Add to add more shares details.
If the details are correct and you’ve finished making changes, select Next.
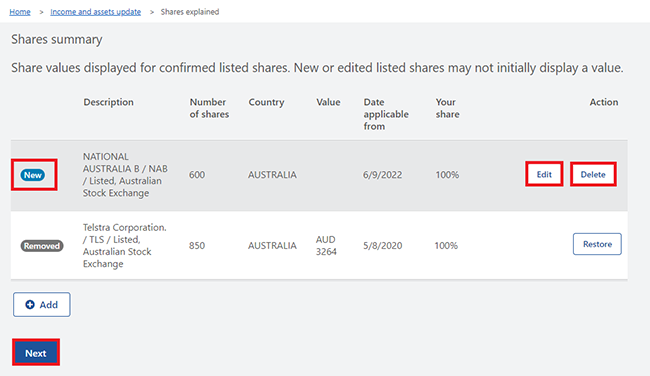
If you’re ready to review and submit your changes, select Continue.
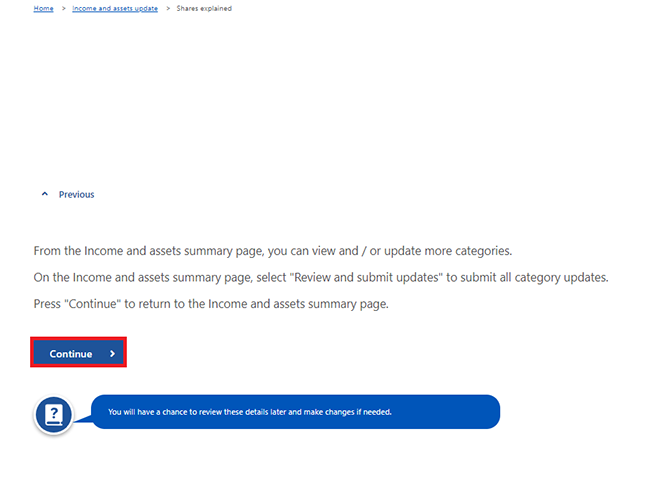
Step 6: review and submit
The Income and assets summary page shows updates that are ready to review and submit.
We’ll cancel your changes if you don’t submit them by the date we tell you.
Select either:
- Cancel updates if you no longer want to update your details or need to start again
- View/Edit details in another category to view or make changes.
To submit your changes, select Review and submit updates.
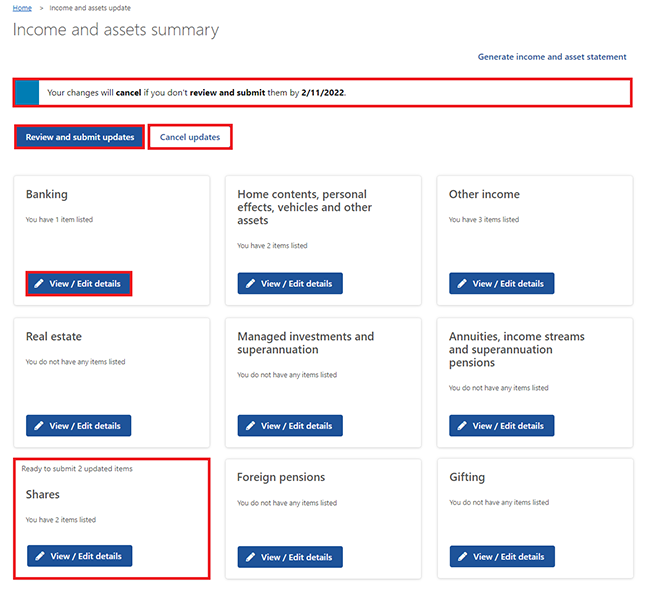
Select Begin to check your updates are correct.

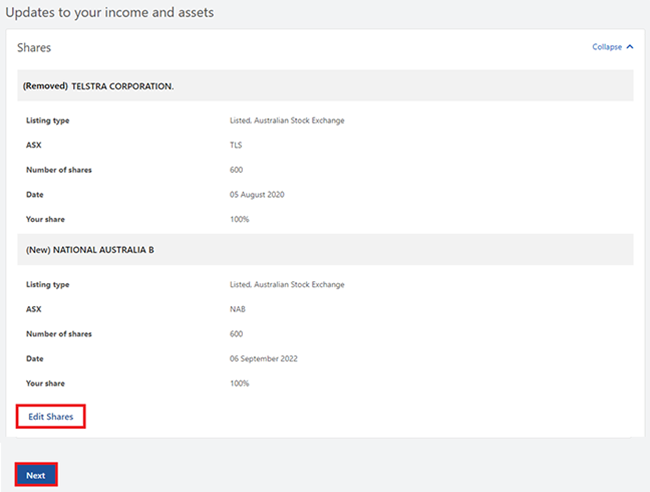
We’ll give you a summary of the details you’ve given us.
Review each section to check your details are correct. If you need to make changes, select Edit Shares.
If all the details are correct, select Next.
Read the declaration. If you understand and agree with the declaration, select I declare and understand that:.
Then select Next.

Select Confirm information to save the information you’ve given us and continue. You won’t be able to make any changes to your answers after this.
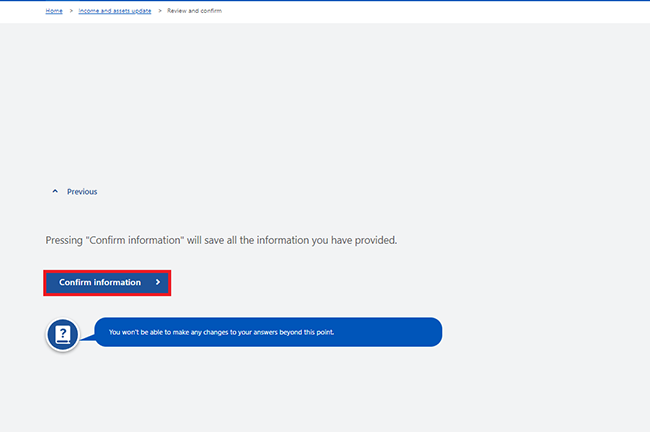
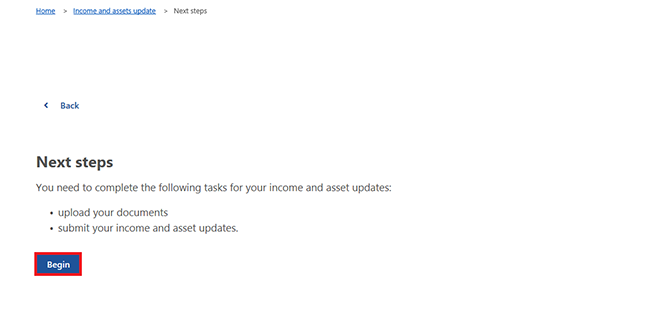
Before you submit your update, you may need to complete some extra tasks. These will be listed in Next steps.
Select Begin to complete the extra tasks for your update.
If you don’t need to complete extra tasks, go to Get your receipt.
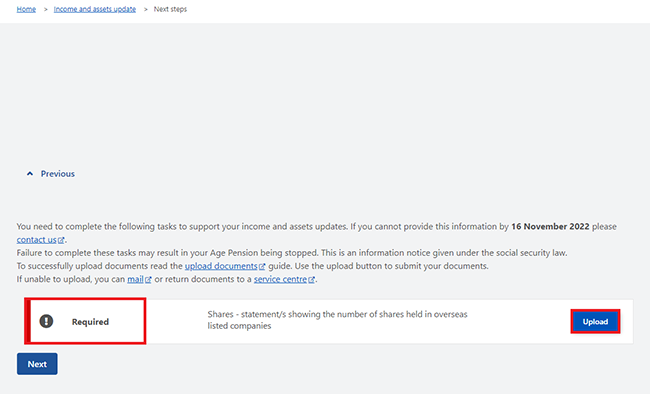
These tasks will show as Required.
When a task is Required you must complete it before you can submit your update.
Select Upload for the task you need to complete. You’ll need to do this for each Required task.
Read our online guides on how to do any of the following
- upload documents using your Centrelink online account
- upload documents using the Express Plus Centrelink mobile app.
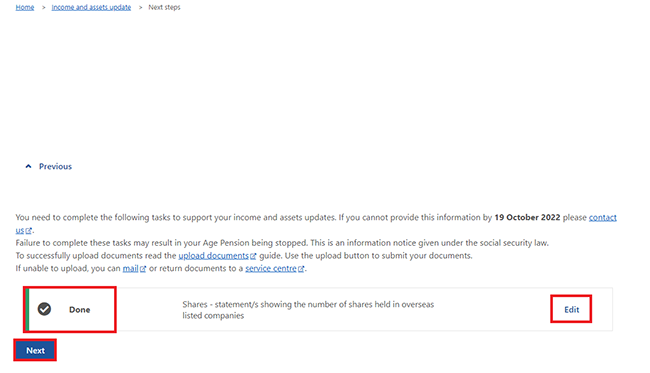
When you’ve completed the task, the status changes from Required to Done.
If you’ve completed a task and you need to change it, select Edit.
When you’ve completed all Required tasks, select Next.
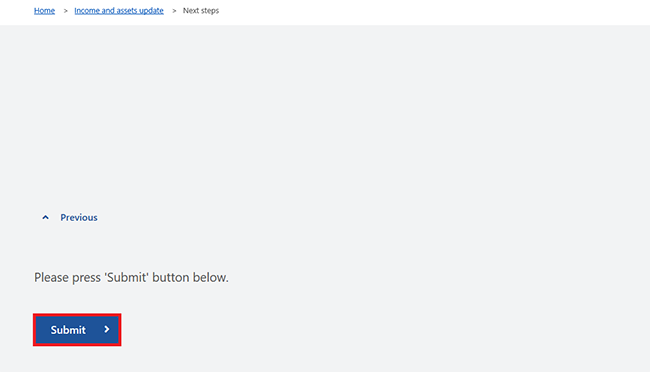
If you’re ready to submit your update, select Submit.
Get your receipt
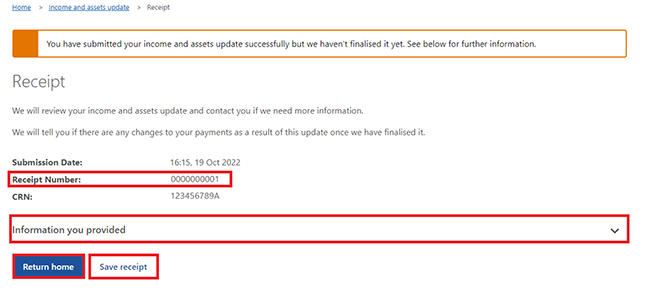
We’ll give you a receipt when you submit your update. Make a note of the Receipt Number for your records.
You won’t be able make changes to any of your income and assets details until we finalise your updates. We may contact you to do this.
On this page, you can select any of the following:
- Information you provided to view a summary of the details you’ve given us
- Return home to go back to your homepage
- Save receipt to keep a copy of your receipt.
Read our online guides on how to do any of the following:
- update your banking details
- update your managed investments and superannuation
- update your real estate information
- update your home contents, personal effects, vehicles and other assets details
- update your other income details.
Step 7: sign out
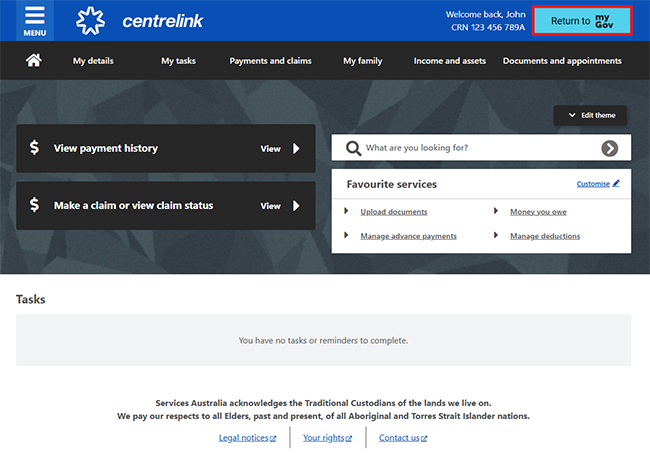
From your homepage you can complete other transactions or select Return to myGov to go back to your myGov account.
For your privacy and security, sign out when you’ve finished using your myGov account.
View other online account and Express Plus mobile app guides and video demonstrations about using your online account.