in this guide
If you need to update or remove your study details, there’s a different way to do this. For help, read Centrelink online account help - update your study details.
Read the following information about when you can add new study details online:
- ABSTUDY, ABSTUDY Pensioner Education Supplement and Youth Allowance job seeker customers can add new study details any time
- Youth Allowance student, Austudy and Pensioner Education Supplement customers can add new study details if their study end date is within the next 13 weeks
- Customers who only get Tertiary Access Payment can’t add new study details.
The screenshots in this guide are from a computer. The page layout will look different if you’re using a mobile device.
Step 1: get started
Sign in to myGov or the myGov app and select Centrelink.
From your homepage, select MENU.
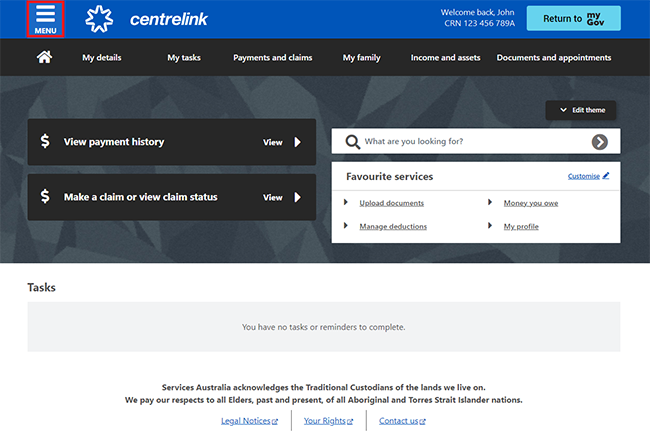
Select My details, then Personal and contact details and Manage study details.

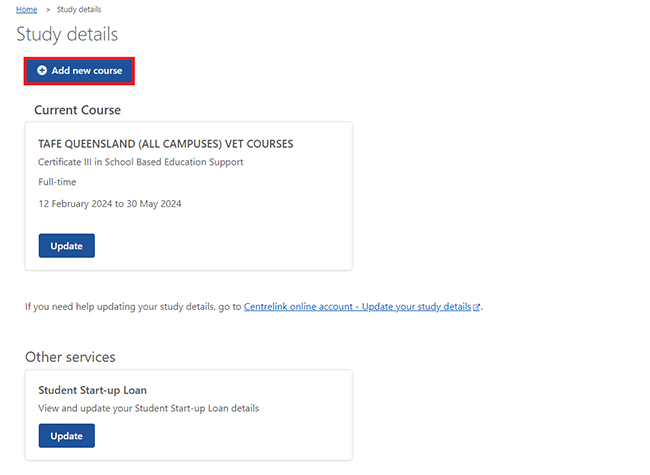
Your study details will show on the Study details page.
Select Add a new course.
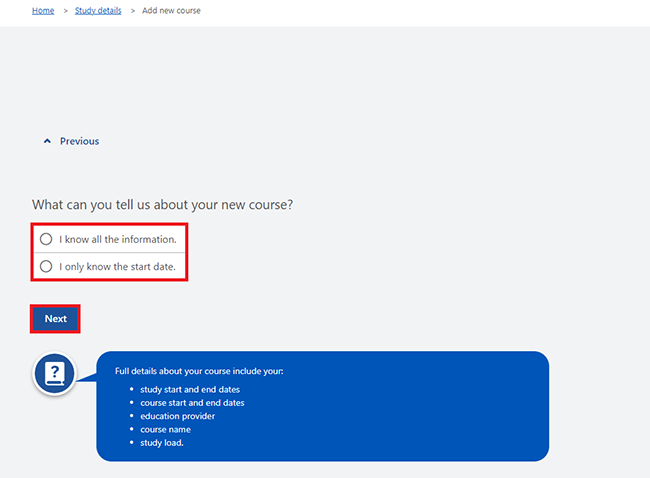
Select Next to tell us about your new course.

If you get ABSTUDY, ABSTUDY Pensioner Education Supplement or Pensioner Education Supplement, or Youth Allowance as a job seeker, go to Step 3.
If you get Austudy or Youth Allowance as a student, and you:
- only know the start date, select I only know the start date, then select Next. Go to Step 2.
- know all the details of your new course, select I know all the information. Then select Next. Go to Step 3.
Step 2: add new course when you don’t know the full details
Select the calendar icon and enter the date you’ll start studying. Then select Next.

Select Continue to proceed.
Go to Step 4.

Step 3: add new course when you know the full details
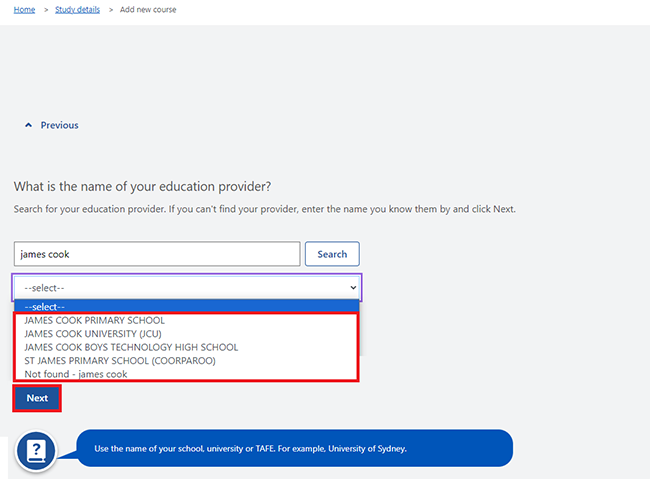
Enter the name of your education provider, then select Search. If you can’t find your provider, enter the name you know them by.

Select your education provider from the dropdown menu, then select Next.
Select the campus you’re studying at, then select Next.

Enter the name of your course, then select Search. If you can’t find your course, enter the name you know the course by.
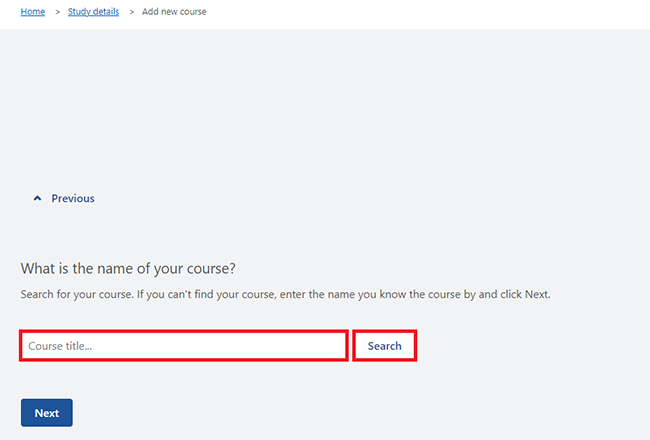
Select your course from the dropdown menu, then Next.

Select your course code from the dropdown menu, then Next.
If your course code doesn’t show, select either:
- Other to enter it
- Unknown if you don’t know it.

Select how you’re completing your study from the dropdown menu, then Next.

Select the year or stage of the course you’ll be studying this study period from the dropdown menu. Then select Next.

Select the calendar icon and enter the date you started or will start studying. Then select Next.

Select the calendar icon and enter the start date of your course. Then select Next.
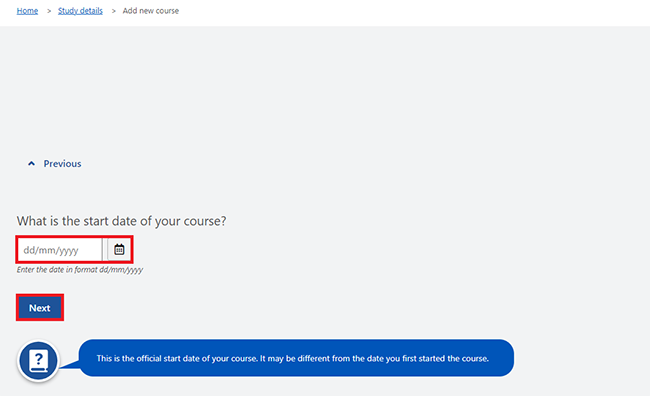
Select the calendar icon and enter the date you expect to complete your course. This will be the date of your final exam at the end of your course. If your course end date changes before then, you’ll need to tell us.
Then select Next.

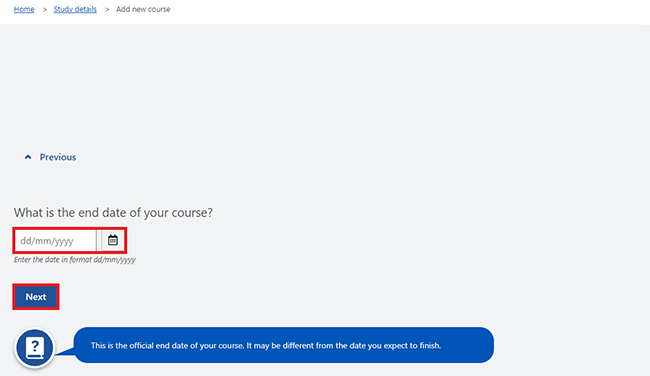
Select the calendar icon and enter the end date of your course. Then select Next.
Select whether you’re studying Full time or Part time, then Next. If you’re studying part time, we’ll ask some more questions.

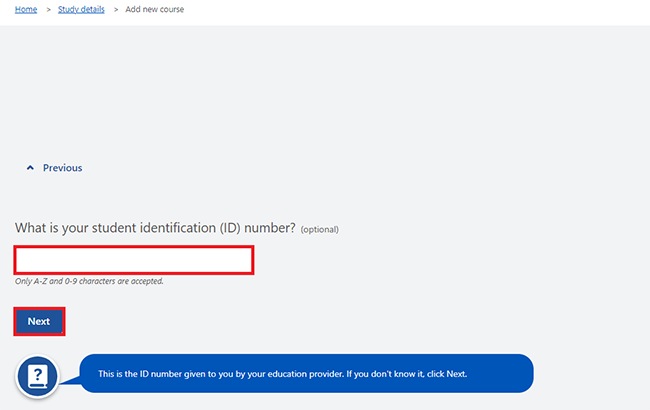
Enter your student identification (ID) number, then select Next. If you don’t know it, select Next.
Select Continue to proceed.

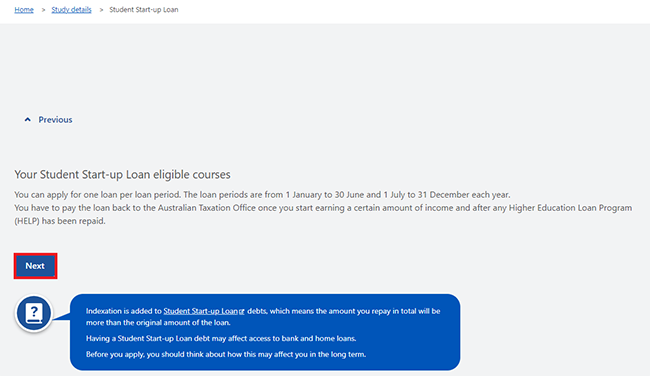
If you’re eligible, we’ll ask if you want to apply for a Student Start-up Loan. Read the information about Student Start-up Loan, then select Next.
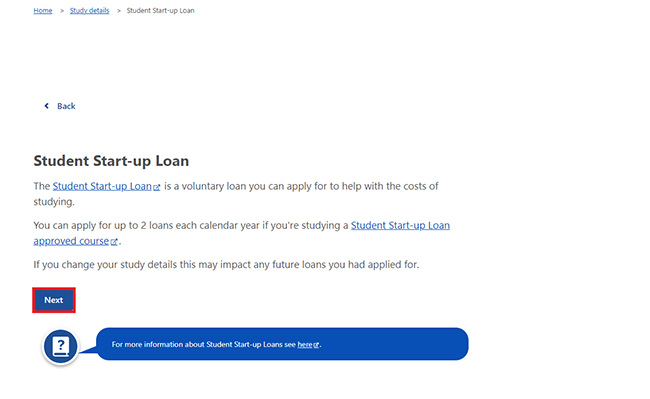
Select Next to continue.
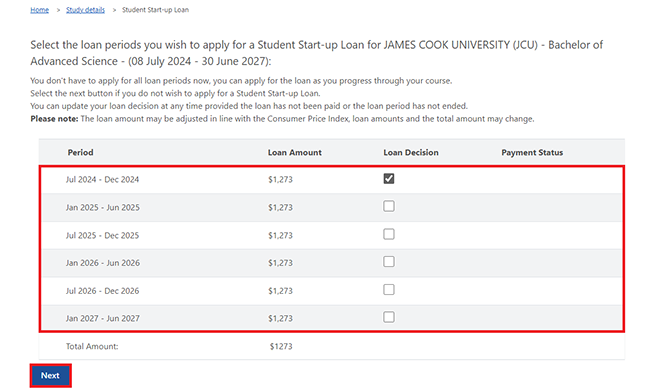
If you want to apply for a Student Start-up Loan, select the box next to the period you want to apply for.
If you don’t want to apply for a Student Start-up Loan, don’t select any boxes under your Claim Decision.
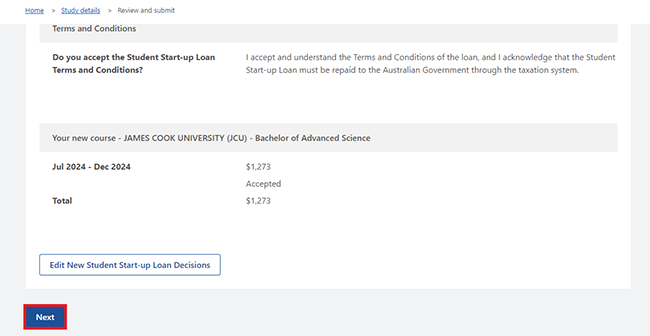
In this example, we’ll apply for one loan period of Jul 2024 to Dec 2024.
Then select Next.
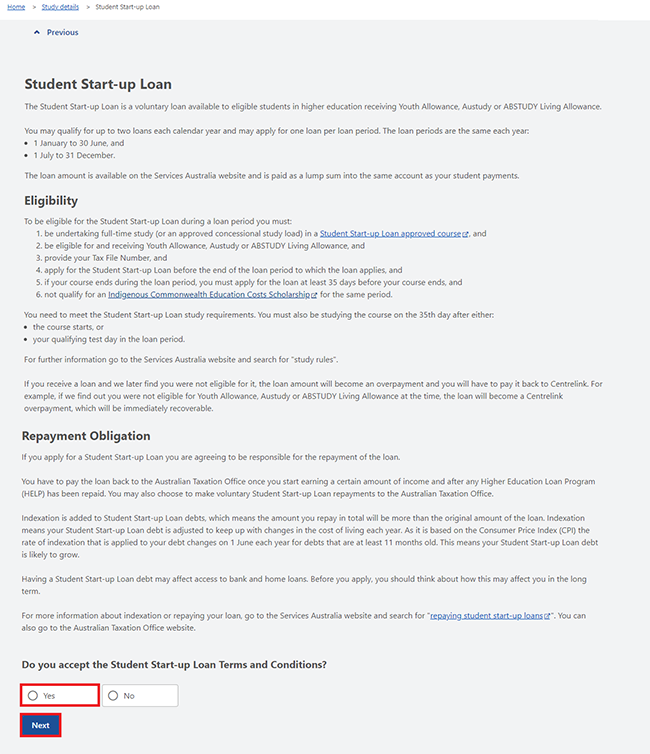
If you apply for a Student Start-up Loan, we’ll ask you to accept the Student Start-up Loan Terms and Conditions.
If you understand and accept the Terms and Conditions, select Yes, then Next to continue.
Select Continue to proceed.

Step 4: review and submit
Select Next to review and submit your updates.

We’ll give you a summary of the details you’ve given us. Check each section to make sure it’s correct.
If the details are wrong, select the Edit button. For example, select Edit new course details to change those details.

If all the details are correct, select Next.
Read the declaration. If you understand and agree with the declaration, select I have read and agree with the above conditions, then Submit.

Get your receipt
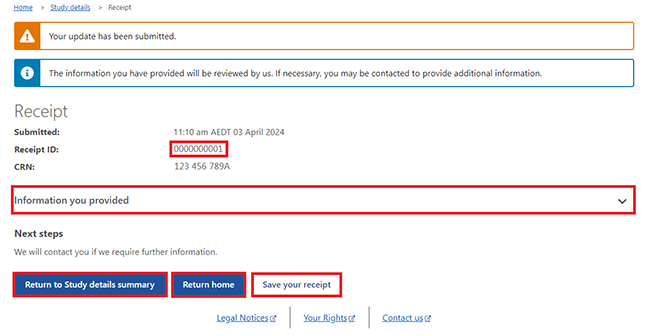
We’ll give you a receipt when you submit your update. Make a note of the Receipt ID for your records.
You won’t need to do anything else unless we ask you to.
Select any of the following:
- Information you provided to view a summary of the details you’ve given us
- Return to Study details summary to go back to the Study details page
- Return home to go back to your online account homepage
- Save your receipt to keep a copy of your receipt.
In this example, we’ll select Return to Study details summary to go back to the Study details page.
On the Study details page, we’ll tell you the following:
- your update is complete or is waiting to be processed
- if your update is waiting to be processed, you won’t be able to update your study details again until we complete this update.
Select Home to go back to your online account homepage.

Step 5: sign out
From your homepage, you can complete other transactions or select Return to myGov to go back to your myGov account.
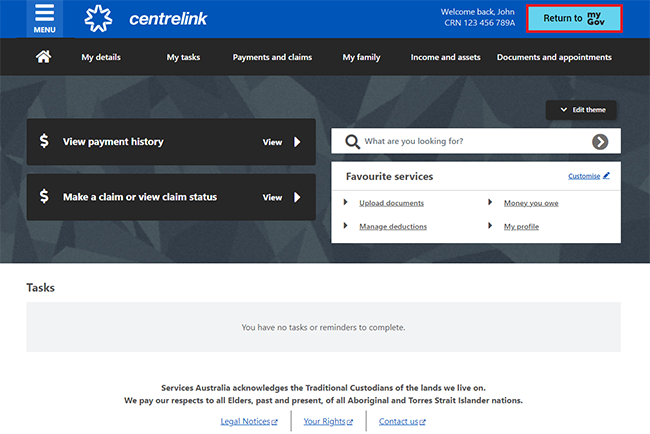
For your privacy and security, sign out when you’ve finished using your myGov account.
View other online account and Express Plus mobile app guides and video demonstrations about using your online account.