in this guide
You need to tell us when your circumstances change. We can then assess your eligibility for payments and services using the correct details. This includes changes to your and your partner’s income. You can make changes to your partner’s other income if they permit you to access their information.
Read more about income and how it may affect your payment.
The screenshots in this guide are from a computer. The page layout will look different if you’re using a mobile device.
Step 1: get started
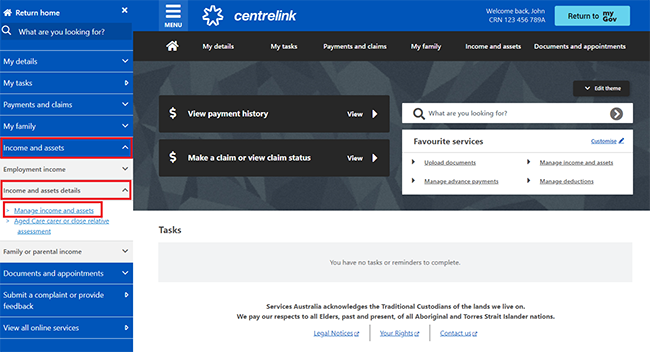
Sign in to myGov or the myGov app and select Centrelink.
Select MENU from your homepage.

Select Income and assets, then Income and assets details and Manage income and assets.
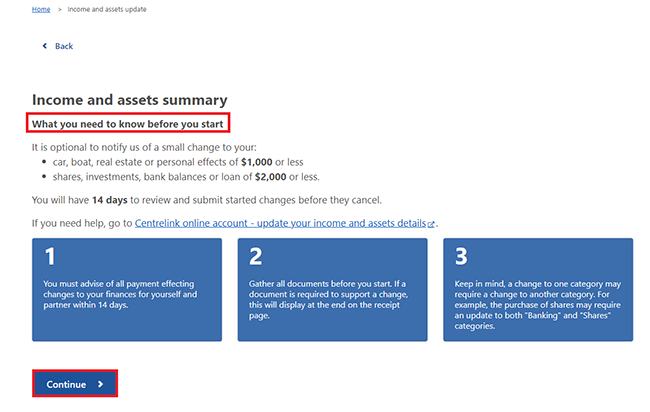
Read What you need to know before you start. Then select Continue to proceed.
Step 2: view other income details
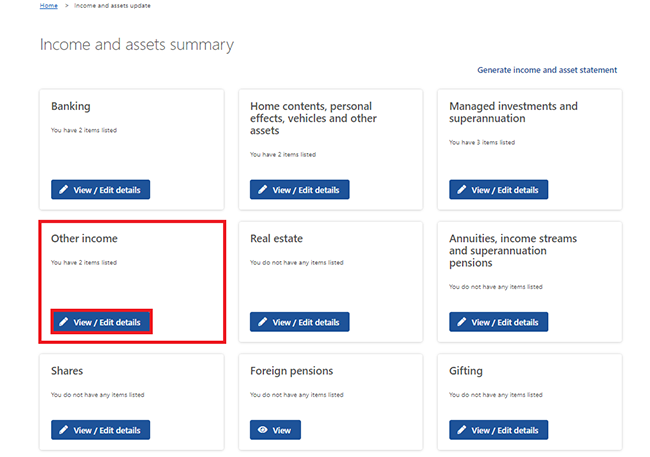
On the Income and assets summary page, select View/Edit details in Other income.
Read Other income explained, then select Begin.

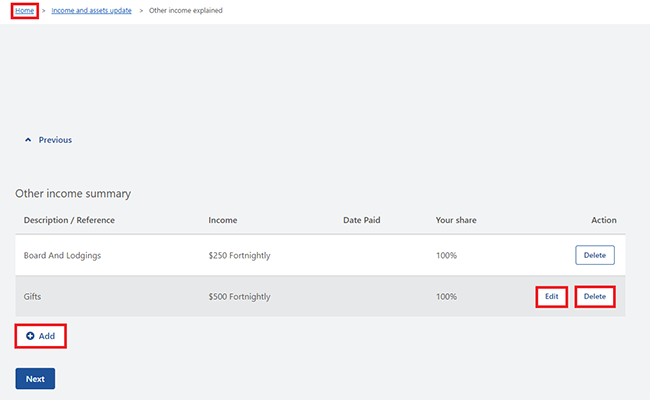
The other income details you’ve already told us about will show.
Select any of the following:
- Home if you don’t need to make any changes
- Edit to update your other income details and go to Step 2 for instructions
- Delete to remove your other income details and go to Step 3 for instructions
- Add to add new other income details and go to Step 4 for instructions.
Some of your other income types may not have an edit or delete option. You’ll need to contact us on your regular Centrelink payment line to update these items.
Step 3: edit other income details
If you need to update any of your other income, select Edit.
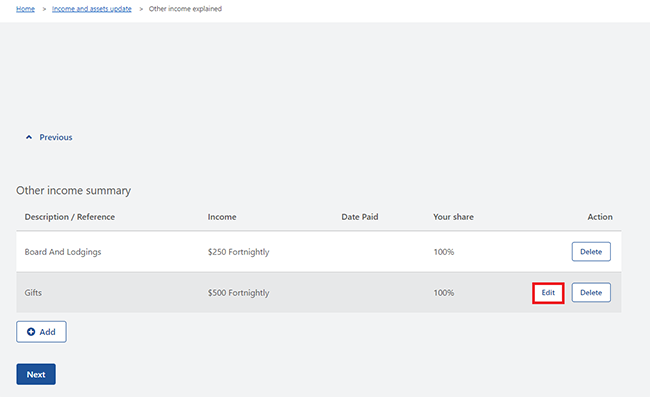
Select Begin to edit your other income details.
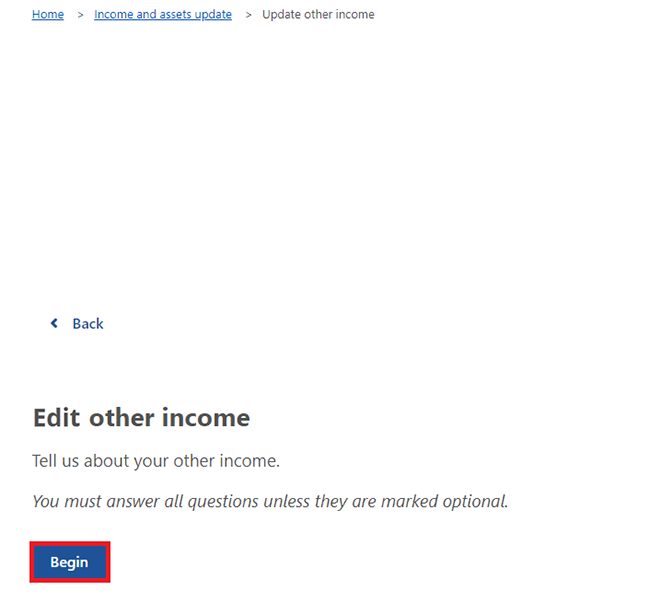
Enter how much the payment was and select its frequency from the dropdown menu. The amount you enter needs to be a whole number.
Then select Next.
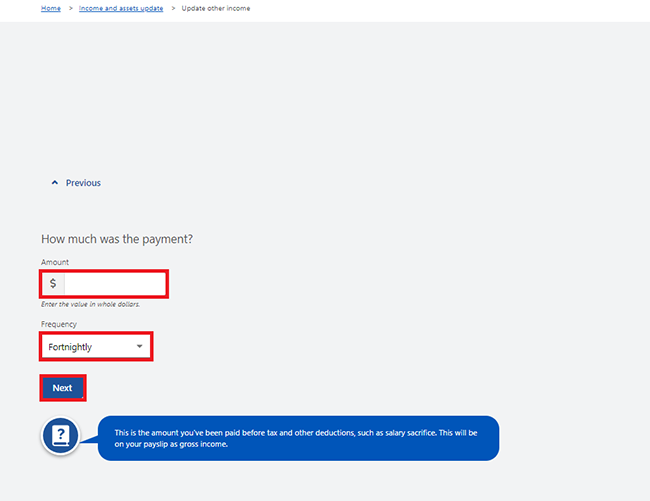
Select the calendar icon and enter the date of the change. Or, enter it manually in the format of dd/mm/yyyy.
Then select Next.
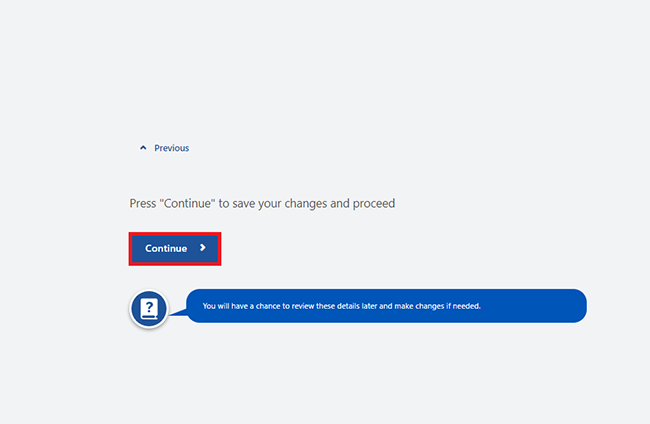
Select Continue to save your changes and proceed.
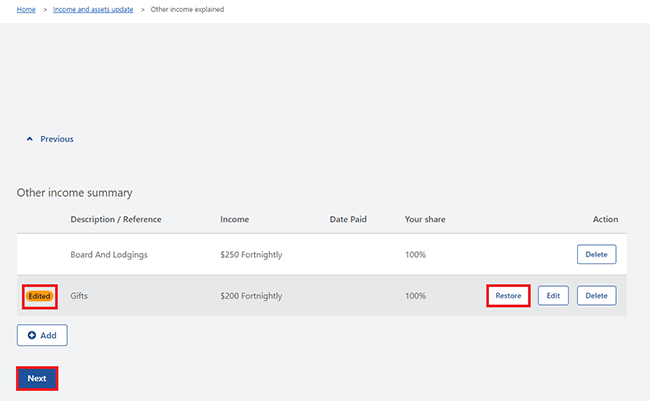
The details you changed will show as Edited on the Other income summary page. Check the information to make sure it’s correct.
If you’ve entered the wrong details, select Restore to bring back your previous details.
To delete other income details, go to Step 4.
To add new other income details, go to Step 5.
If the details are correct and you’ve finished making changes, select Next.
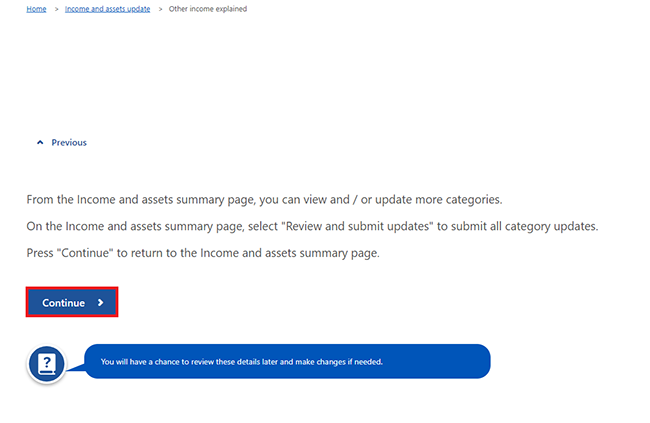
If you’re ready to review and submit your changes, select Continue.
Go to Step 6 for instructions on how to review and submit your changes.
Step 4: delete other income details
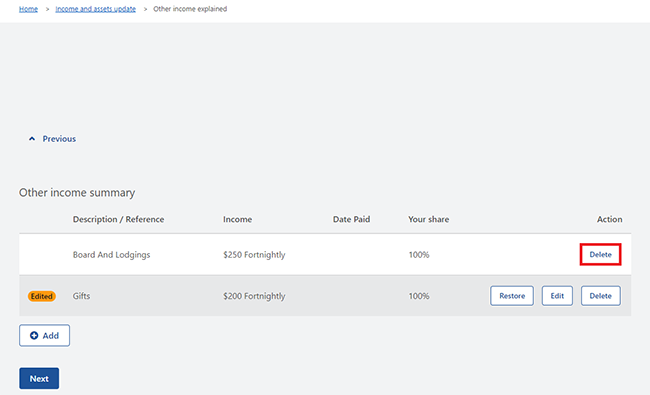
If you need to remove any of your other income details, select Delete.
Select either:
- OK to continue
- Cancel if you no longer want to delete your other income details.

Select Begin to continue.
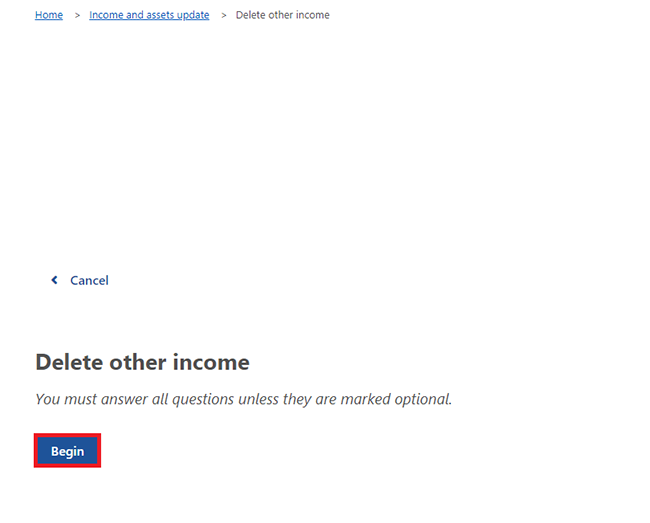
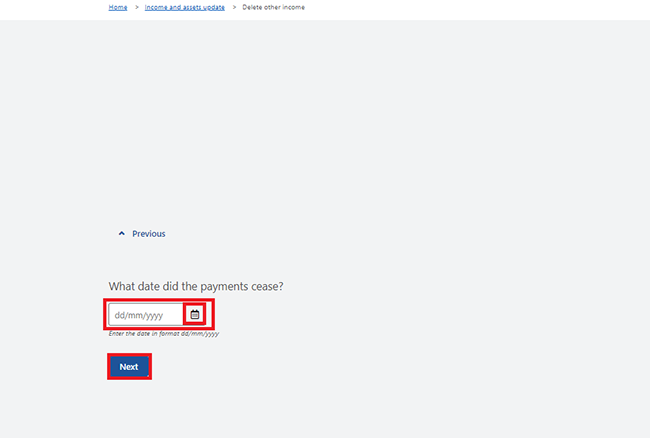
Select the calendar icon and enter the date your other income stopped. Or, enter it manually in the format of dd/mm/yyyy.
Then select Next.
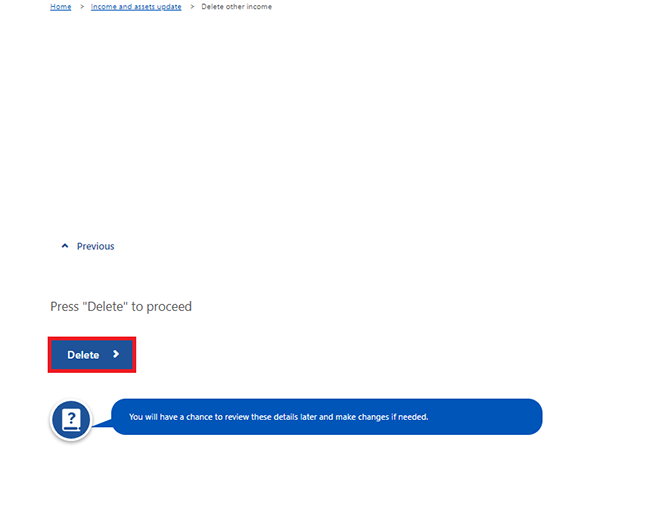
Select Delete to proceed.
The details you deleted will show as Removed on the Other income summary page.
If you’ve deleted the wrong details, select Restore to bring back your previous details.
To add new other income details, go to Step 5.
If the details are correct and you’ve finished making changes, select Next.
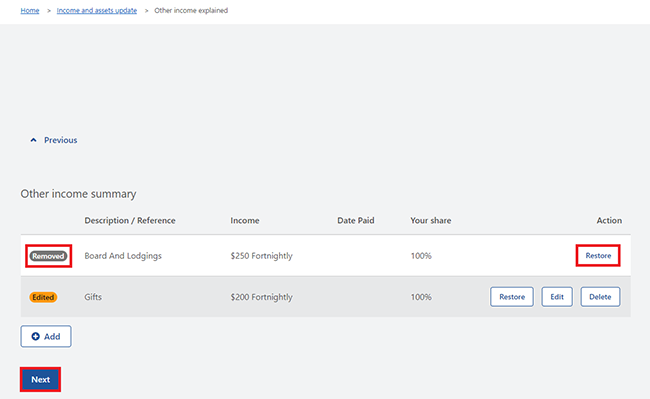
If you’re ready to review and submit your changes, select Continue.
Go to Step 6 for instructions on how to review and submit your changes.
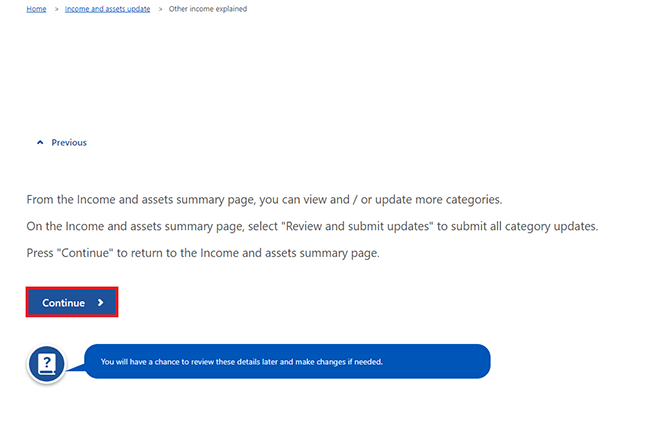
Step 5: add other income details
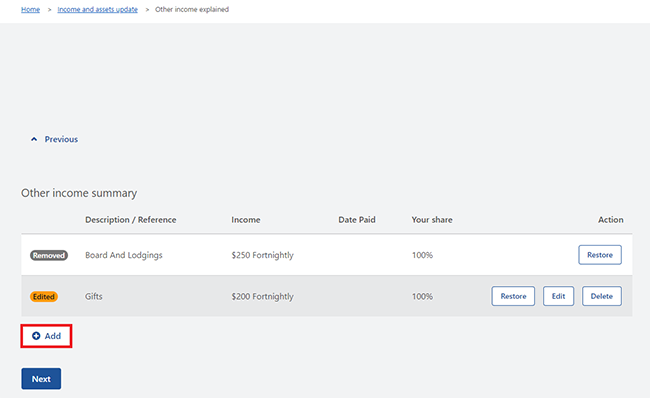
To add new other income details, select Add.
You can’t use this service to record one-off employment income. If you’ve been paid one-off employment income, you can report this when you report employment income.
Select Add.
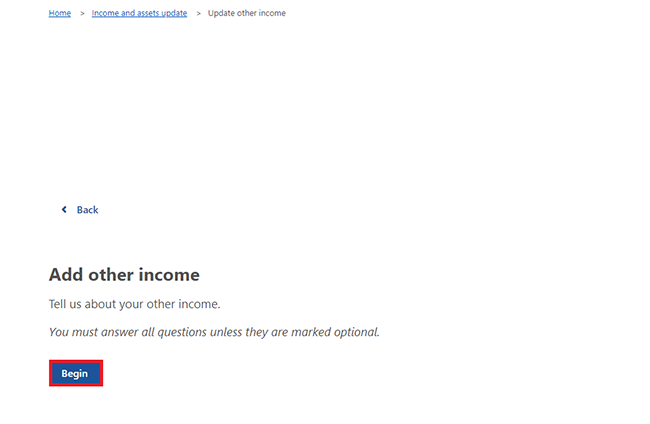
Select Begin to continue.
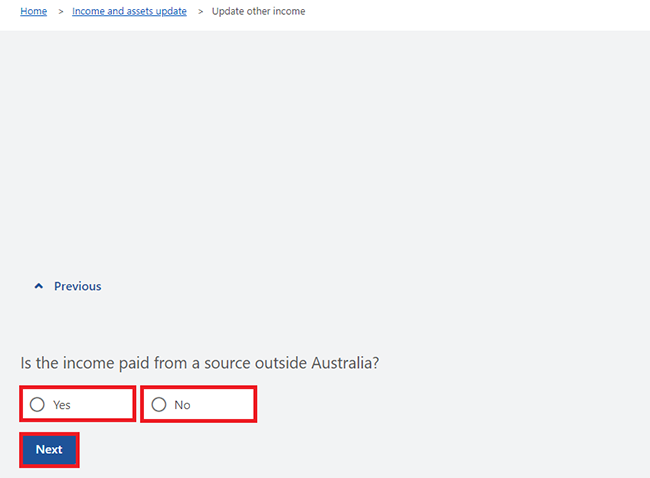
Select Yes or No to tell us if your other income is paid from a source outside Australia.
Then select Next.
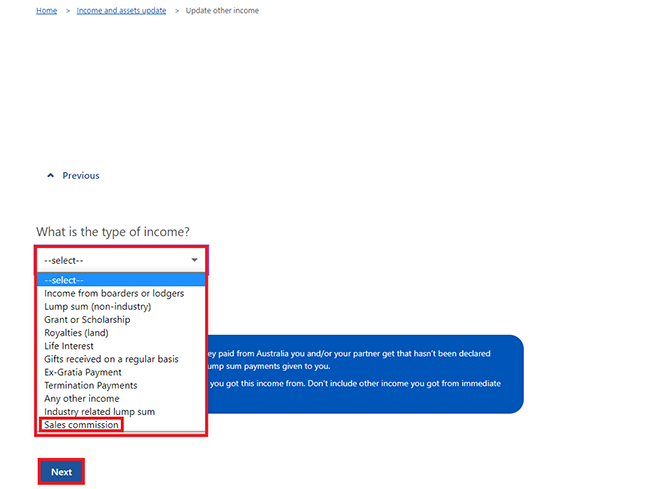
Select the type of income from the dropdown menu.
In this example we’ll select Sales commission.
Then select Next.
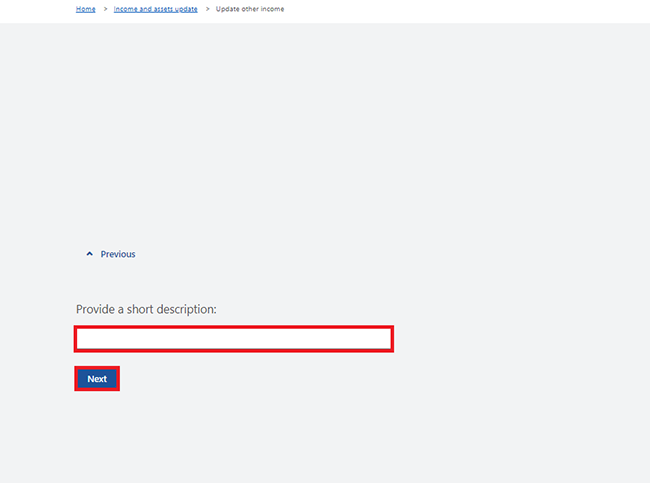
Enter a short description of your other income, then select Next.
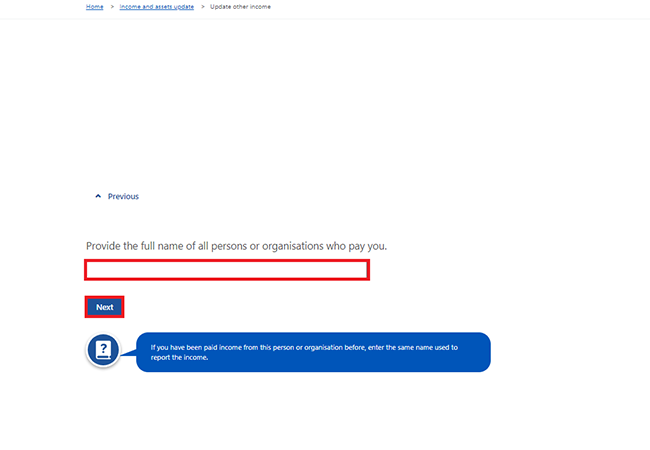
Enter the full name of all persons or organisations who pay you.
Then select Next.
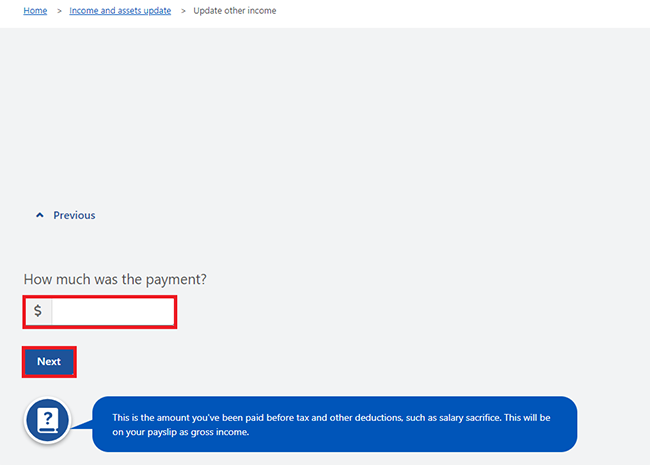
Enter the payment amount, then select Next.
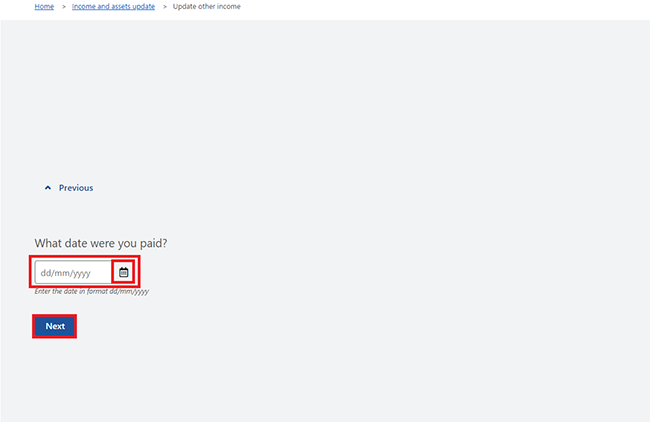
We’ll ask you some more questions about your other income. We may ask you to give details about the date you were paid.
The questions we ask you depend on the other income you’re adding. Answer all the questions, then select Next to continue.
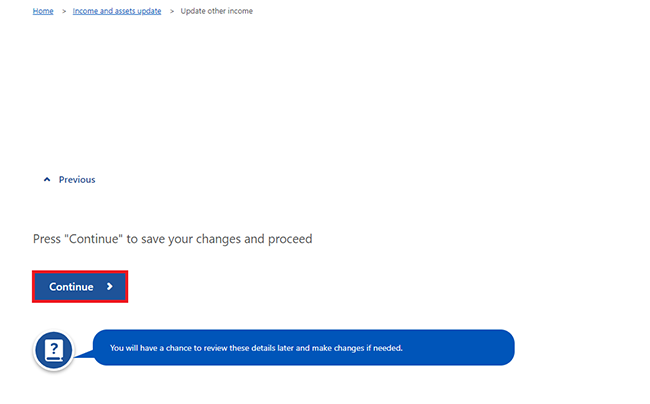
When you’ve answered all of the questions, select Continue to save your changes and proceed.
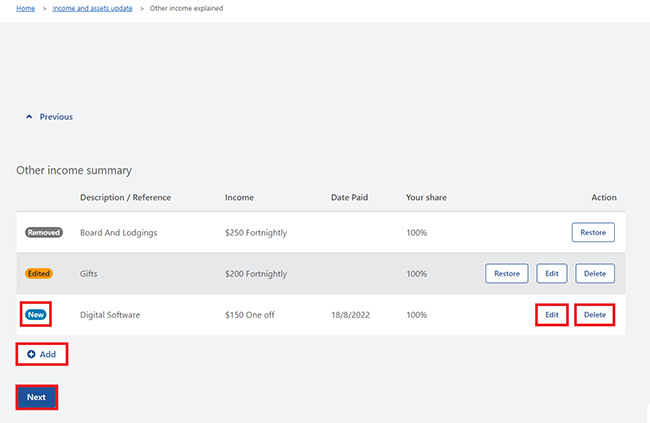
The details you added show as New on the Other income summary page. Check the information to make sure it’s correct.
On this page, you can select any of the following:
- Edit if you need to make changes
- Delete to remove your update
- Add to add more other income details.
If the details are correct and you’ve finished making changes, select Next.
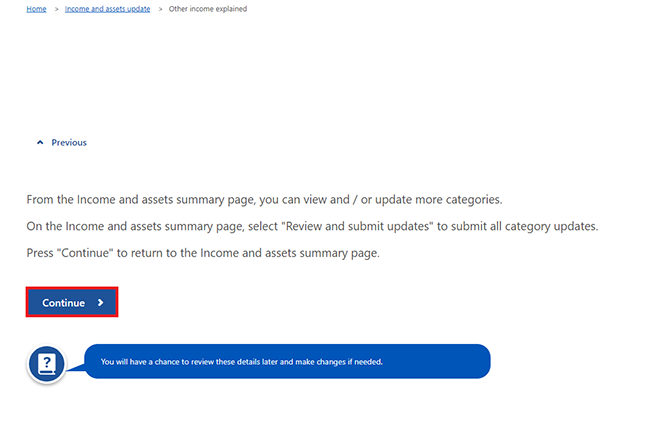
If you’re ready to review and submit your changes, select Continue.
Step 6: review and submit
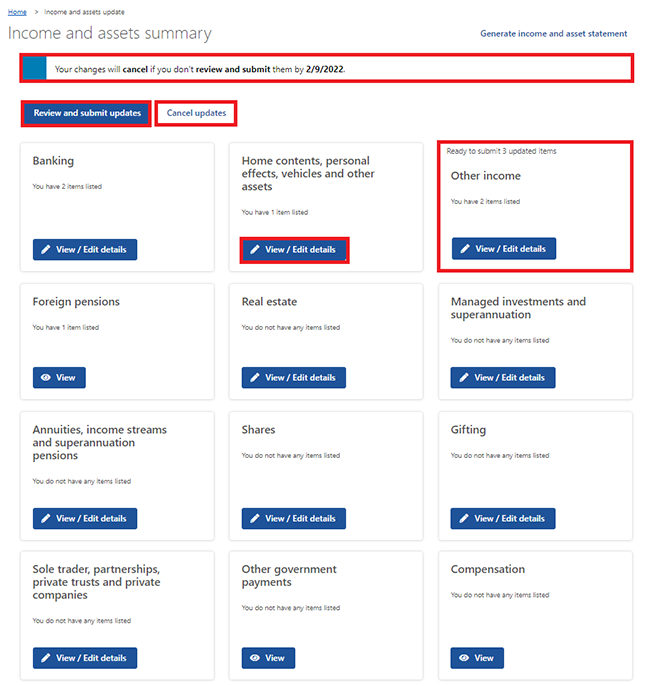
The Income and assets summary page shows updates that are ready to review and submit.
We’ll cancel your changes if you don’t submit them by the date we tell you.
Select either:
- Cancel updates if you no longer want to update your details or need to start again
- View/Edit details in another category to view or make changes.
To submit your changes, select Review and submit updates.
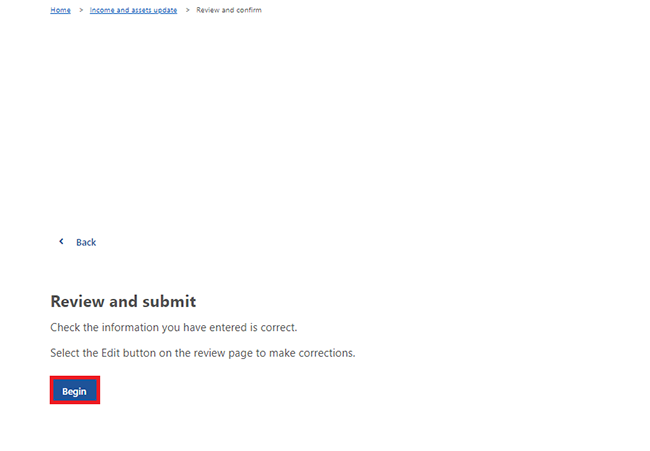
Select Begin to check your updates are correct.
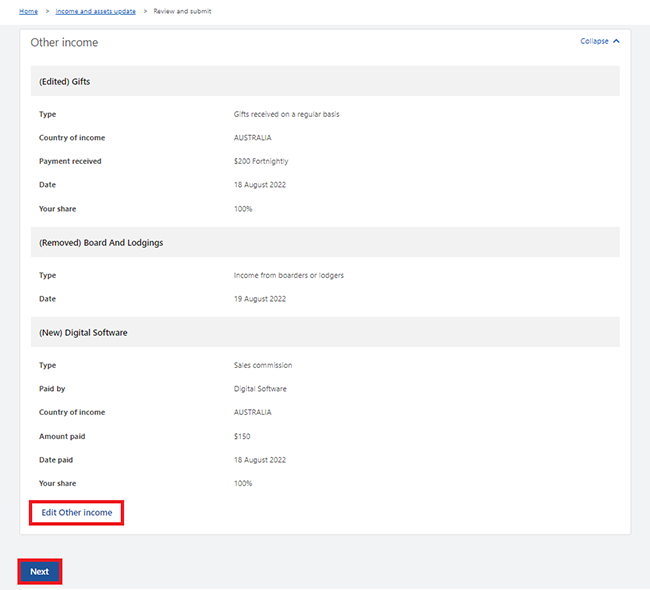
We’ll give you a summary of the details you’ve given us.
Review each section to check your details are correct. If you need to make changes, select Edit other income.
If all the details are correct, select Next.
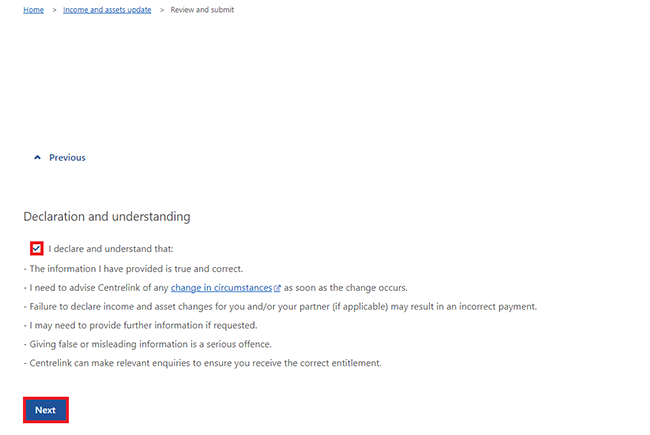
Read the declaration. If you understand and agree with the declaration, select I declare and understand that:.
Then select Next.
Select Confirm information to save all the information you’ve given us and continue. You won’t be able to make any changes to your answers after this.
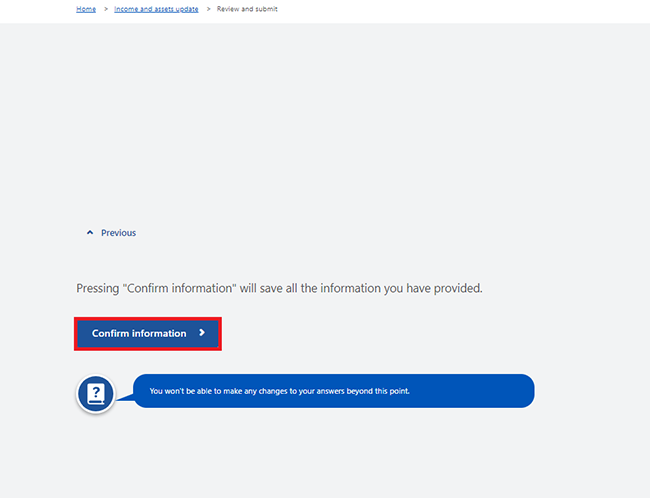
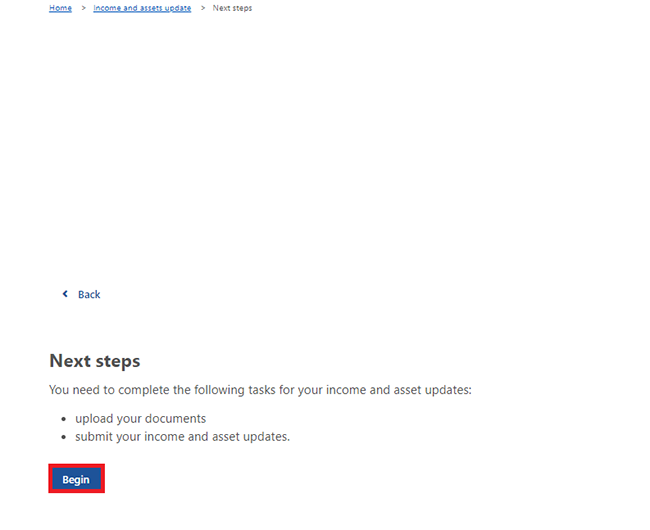
Before you submit your update, you may need to complete some extra tasks. These will be listed in Next steps.
Select Begin to complete the extra tasks for your update.
If you don’t need to complete extra tasks, go to Get your receipt.
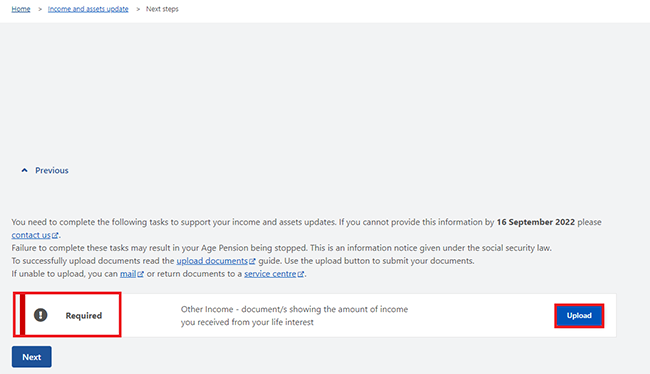
These tasks will show as Required.
When a task is Required, you must complete it before you can submit your update.
Select Upload for the task you need to complete. You’ll need to do this for each Required task.
Read more about how to:
- upload documents using your Centrelink online account
- upload documents using the Express Plus Centrelink mobile app.
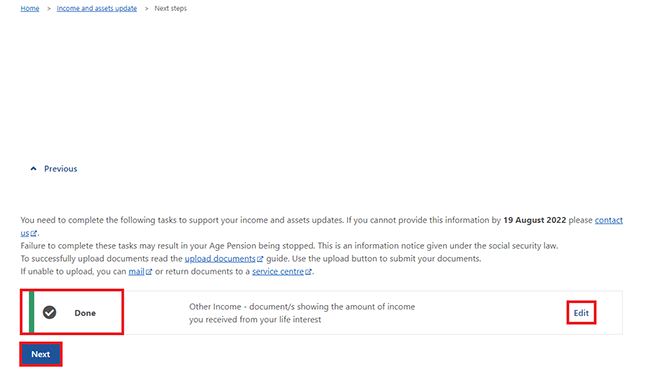
When you’ve completed the task, the status changes from Required to Done.
If you’ve completed a task and you need to change it, select Edit.
When you’ve completed all Required tasks, select Next.
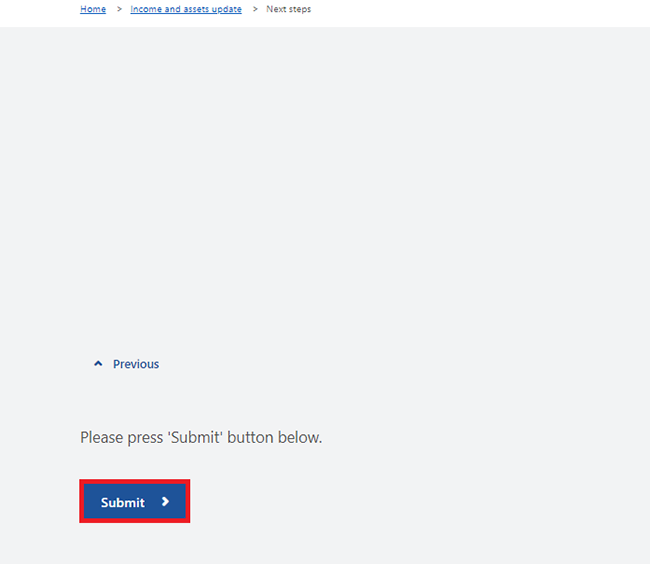
If you’re ready to submit your update, select Submit.
Get your receipt
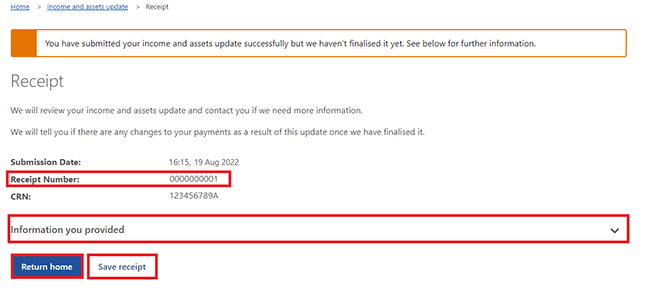
We’ll give you a receipt when you submit your update. Make a note of the Receipt Number for your records.
You won’t be able make changes to any of your income and assets details until we finalise your updates. We may contact you to do this.
On this page, you can select any of the following:
- Information you provided to view a summary of the details you’ve given us
- Return home to go back to your homepage
- Save receipt to keep a copy of your receipt.
Read our online guides on how to do any of the following:
- update your banking details
- update your share details
- update your managed investments and superannuation
- update your real estate information
- update your home contents, personal effects, vehicles and other assets details.
Step 7: sign out
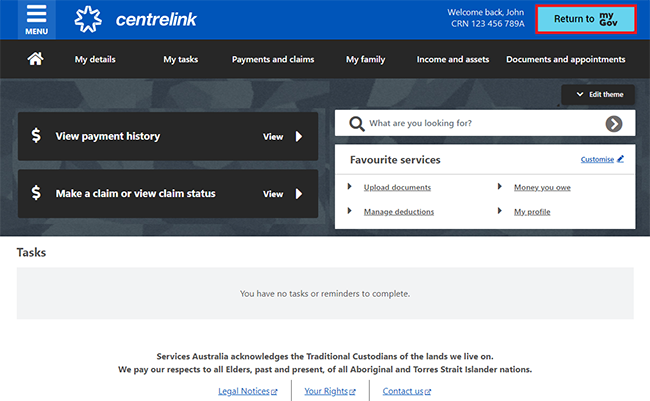
From your homepage you can complete other transactions or select Return to myGov to go back to your myGov account.
For your privacy and security, sign out when you’ve finished using your myGov account.
View other online account and Express Plus mobile app guides and video demonstrations about using your online account.