on this page
Before you start the linking process make sure you have all the information you need ready.
If you need help linking to PBS Online, you can call or email eBusiness Service Centre.
If you need help with PRODA, you can call or email the PRODA team.
Step 1: log in
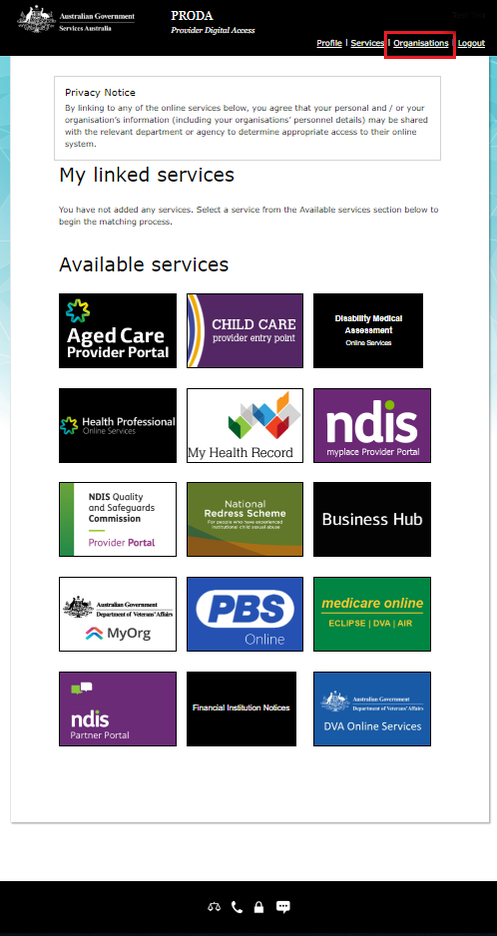
Log in to PRODA and select Organisations.
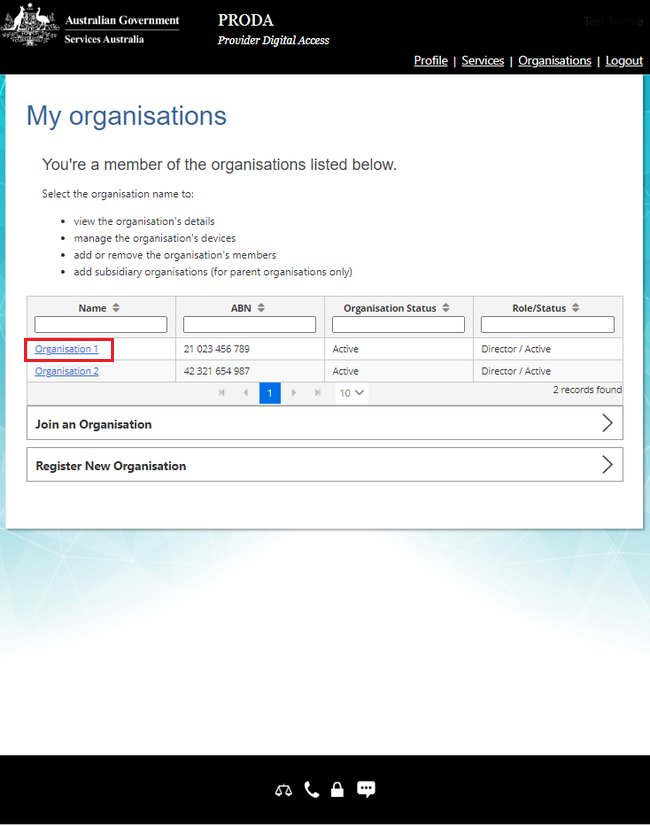
Select which organisation name you want to add PBS Online to.
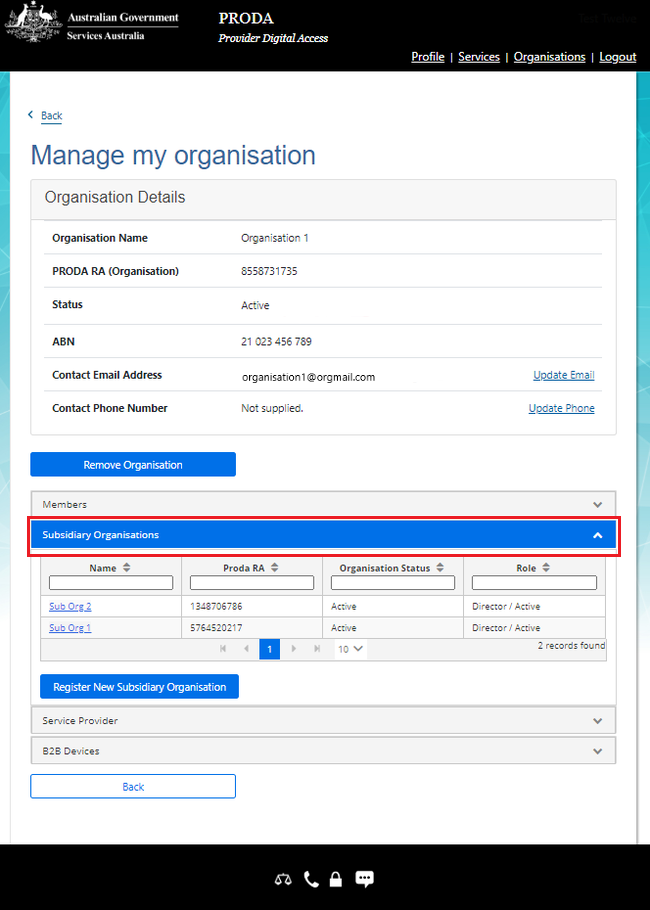
To add it to a subsidiary organisation, expand Subsidiary Organisations and select a subsidiary organisation.
Step 2: add PBS Online as a service provider
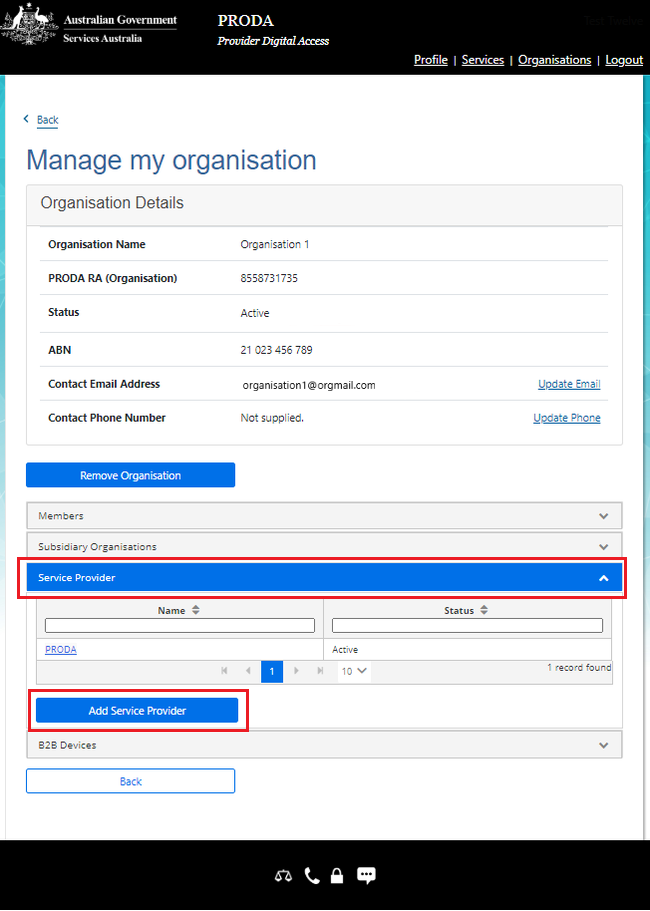
Select Service Provider, and then Add Service Provider.
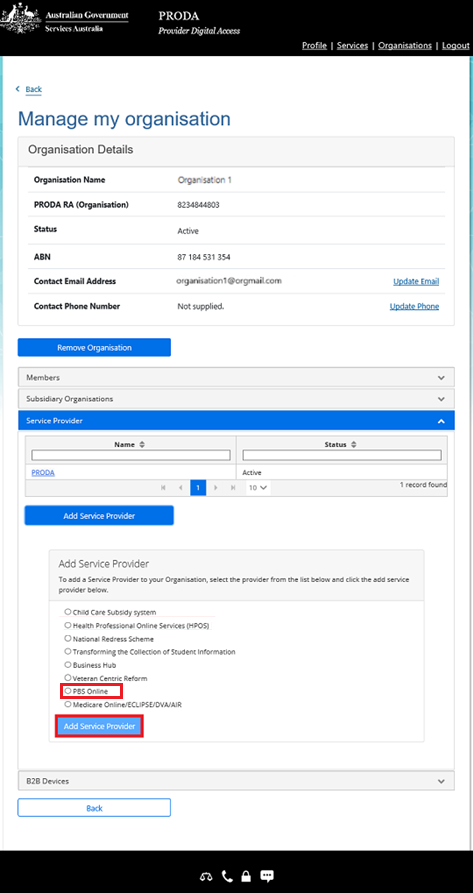
Select PBS Online and then select Add Service Provider.
Step 3: accept the Linking Terms and Conditions
You’ve now left PRODA and are in the Organisation Linking system. Complete the steps below to finalise the linking process.
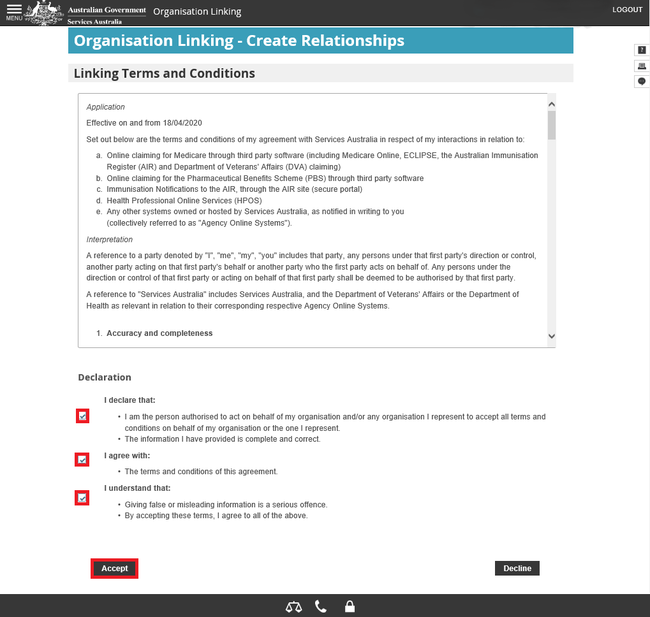
Read the Linking Terms and Conditions. If you agree to them, tick all 3 boxes and select Accept. The Accept button will show after you tick all three boxes.
The Linking Terms and Conditions will appear the first time that you begin the linking process. You’ll need to accept these once.
If you decline the Linking Terms and Conditions, you won’t be able to link. You’ll return back to the My Organisations page in PRODA.
Step 4: identify your organisation
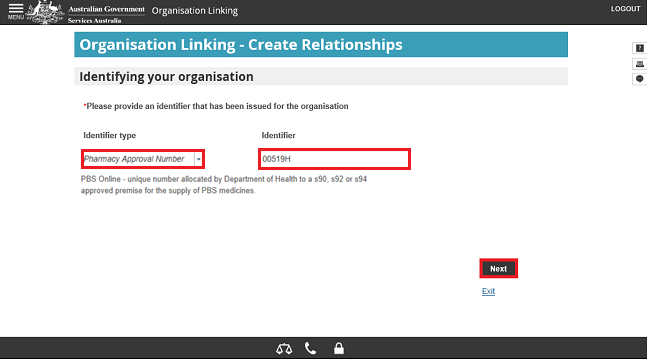
Select Pharmacy Approval Number from the drop down list under Identifier type.
Enter your pharmacy approval number and select Next.
Your organisation has been identified and a relationship to PBS Online has been established.
Select Next.
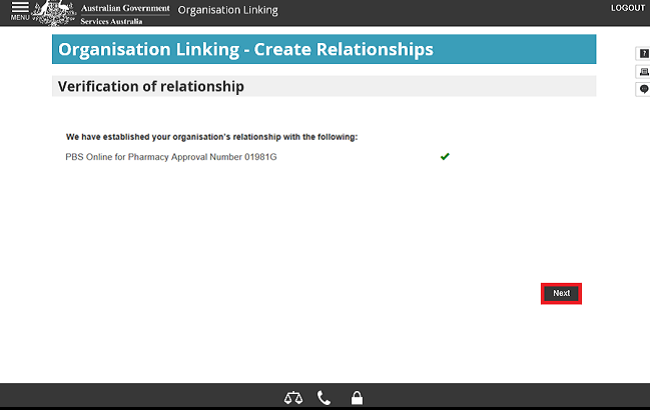
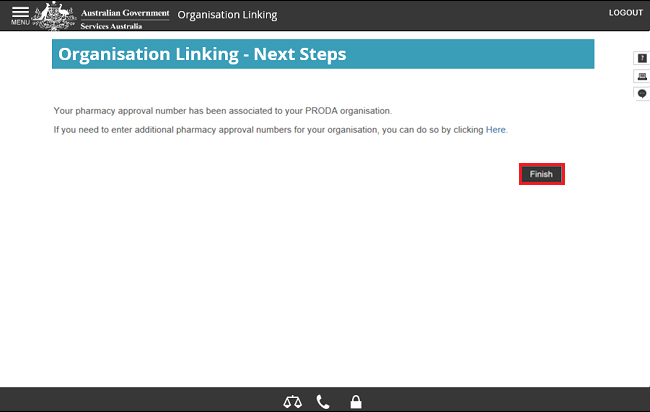
Your pharmacy approval number is now associated to your PRODA organisation.
You can also enter additional pharmacy approval numbers for your organisation. Select Here.
To return to your PRODA services page, select Finish.
Step 5: log out
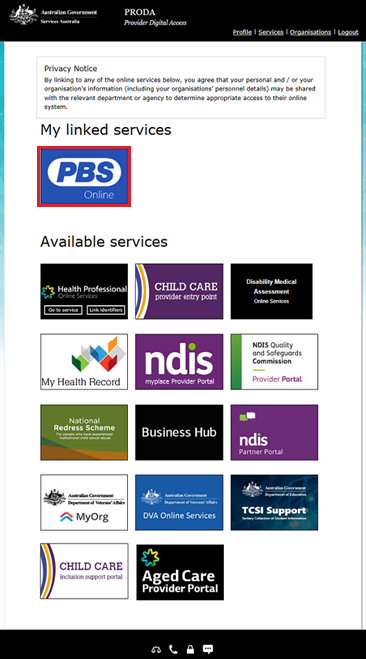
You’ll now have the PBS Online tile as a linked service provider under My linked services.
For your privacy and security, log out when you’ve finished using your PRODA account.
Select Logout.
